3. Nailing of Surfaced Boards
For nailing surfaced boards countersunk head nails should be
used. These nails are easier to flush with the surface of the wood. The length
of the nails should amount to the triple thickness of the boards, approximately.

Figure 6
With open nailing - visible - each board is fixed by two nails
on each beam.
For covered nailing only matched boarding is suited.
Here, one nail is driven obliquely in the groove and tongue.
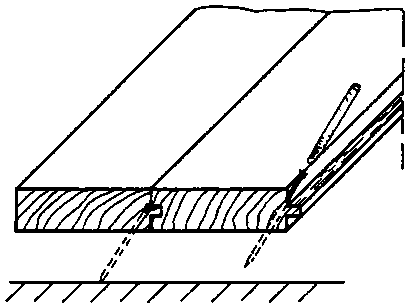
Figure 7
With open, as well as with covered nailing the nails are not
completely driven in. Otherwise there is the risk that the surface or, with
covered nailing, the groove and tongue and the front edge of the boarding are
damaged. The nails are allowed to project 1 to 2 mm; then they are driven in
with the help of the nail punch. The hollows in the surface of the boards left
by this technique can be puttied up.
When can the technique of covered nailing be used?
________________________________________________


