
| Carpentry for Vocational Schools - A Teacher's handbook (GTZ, 252 p.) | ||||
| 11. WALLFRAME | ||||
| (introduction...) | ||||
| 11.1 Parts of a wallframe | ||||
| 11.2. Procedure of making a wallframe | ||||
| 11.3. Erecting a wallframes | ||||
|
| ||||||||||||||||||||||||||||||
TOPIC: 11. WALLFRAME
INTRODUCTION: This topic teaches students the parts of a wallframe, how a wallframe is made, how a wallframe is erected and joined to other wall-frames.
OBJECTIVES:
11.1. Students should be able to name all the parts of a wallframe.
11.2. Students must be able to describe the procedure of making a wallframe. Students should also be able to make wall frames independently.
11.3. Students should be able to describe the procedure of erecting a wallframe.
METHOD: Beside the theoretical lessons it is advised to demonstrate each step when making a wall-frame.
If it is not possible to do it on a building-project, we have to make a model of a wall-frame in the scale 1:10. We can use the foundation model from the previous lessons too.
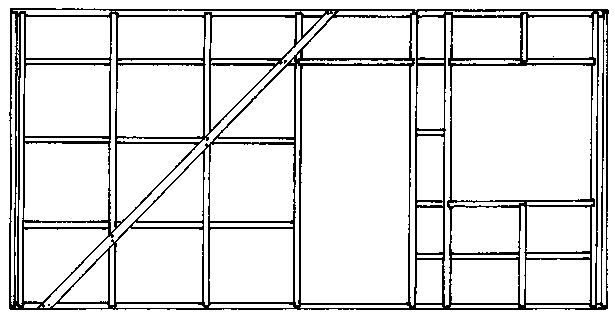
11.1. After explaining in the classroom and making a drawing of a wallframe in the trade theory book, show students a prepared model of a simple wallframe and let students name the parts of it.
11.2. After explaining this step on the black board, get two prepared pieces of long timber where we can demonstrate how corner studs, studs for doors and windows and intermediate studs are marked correctly. We do it first and let students do it afterwards.
When students are confident with marking the studs on the top and bottom plates, prepare small timbers in the scale of 1:10 to make now a model of a wallframe.
When planing to make a complete model house, it is advised to draw a plan before starting the wallframes.
11.3. Erecting wallframes is difficult to demonstrate on a model house. We only can explain it verbally.
NOTE: At the end of this topic prepare 'again a worksheet with questions about wallframes for the students which they have to fill in in their own time to be assessed later.
Figure
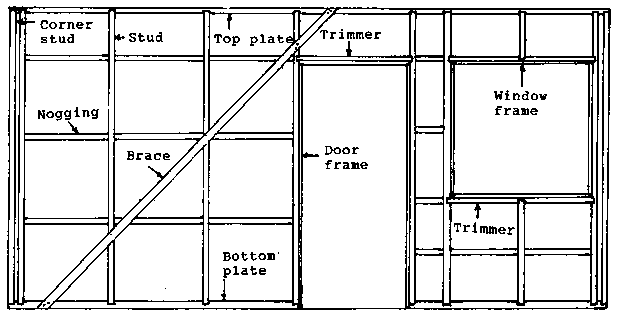
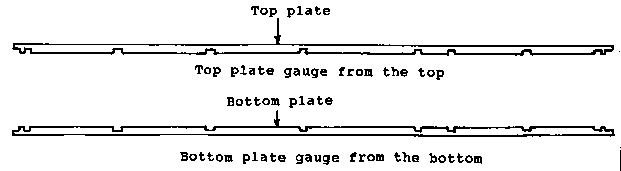
a) Top and Bottom plate: - To join the studs to the top and bottom plate, we use housing joints. Gauge the housing joints with a marking gauge or combination try square, on the topplate from the top and the bottomplate from the bottom. Using this method, we achieve the correct depth of the housing joints even if the timber is not cut at a uniform size. The depth of the housing joint is 5 mm - 10 mm.
Figure
b) Studs: - Mark cornerstuds, doors and windowstuds first, using the straightest pieces. When completed, mark all the other studs using double studs at the corners. Nails are used to fasten studs to bottom and top plate.
Figure
c) Noggings: - Fit the noggings so that the studs are held straight.
Figure
d) Trimmers: - To join the trimmers to the studs use the housing joint. When fitting the trimmers allow enough space for the door and window frame.

Figure
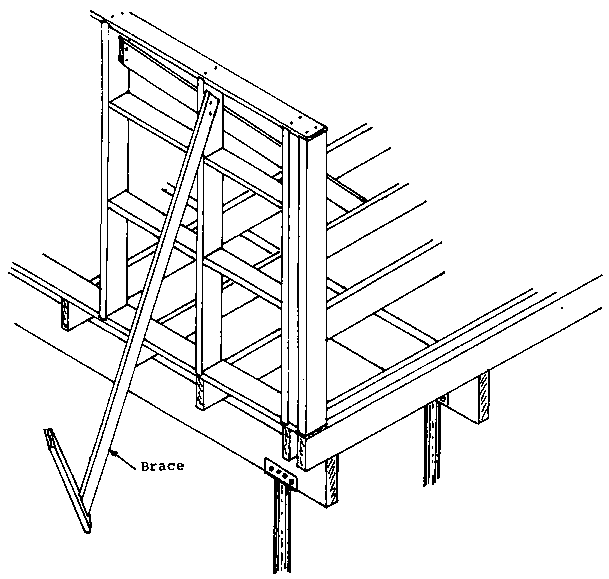
e) Braces: - Before braces are fixed to the frame you must check that the frame is square. This is best done by measuring the diagonals while the frame is lying horizontal on a flat surface. If the frame is squared and braced before it is erected you can be sure that the external corners are plumb.
Figure
a) Erecting Wallframes: - When the walls are ready to be erect, they should be firm and strong enough to take the weight of the ceiling and roof construction without loosing their shape. Before erecting the wallframes, mark the correct place for fitting them on the floor joists with the aid of a string. Start with the outside frames. Use a spirit level or plumb bob to set them correctly vertical. Fit enough braces to hold them in place. Afterwards fit the inside walls.
Figure
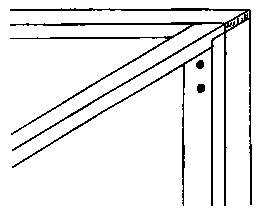
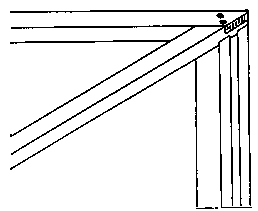
b) Joining wallframes at the corner:
- To join wallframes at the corner we may use the halving joint or the butt joint. In both cases we have to nail the corner.
- Butt joint:
Figure
- Halving joint:
Figure
 |
 |
