Back to Home
Page of CD3WD Project or Back to list of CD3WD Publications
 |  |  | Hammering and Marking - Course: Technique for manual working of materials. Trainees' handbook of lessons (Institut für Berufliche Entwicklung, 17 p.) | |  | (introduction...) | | | 1. Purpose of hammering and marking | | | 2. Tools and accessories | | | 3. Working principle of hammering | | | 4. Working techniques of hammering |  | | 5. Working technique of marking | | | 6. Labour safety recommendations |
|
5. Working technique of marking
The use of marking punches necessitates exact scribing of the
line spacings wherever longer combinations of figures or letters shall be
punched.
The following data may serve as guideline for the spacing of the
lines (A) in relation to the height of the figures or letters (H):
|
A |
H |
|
3 |
2.5 |
|
5 |
4 |
|
8 |
6 |
|
10 |
8 |
|
12 |
10 |
Use a pencil or brass scriber for scribing! After
marking remove the scribed line!
The marking punch is applied similar to a centre punch:
The marking punch is set on the scribed line in inclined
position, aligned, set vertically and hit by one powerful blow.
Notes
- The direction of the row of figure or letter
combinations should be selected so as to permit constant checking of the
alignment!
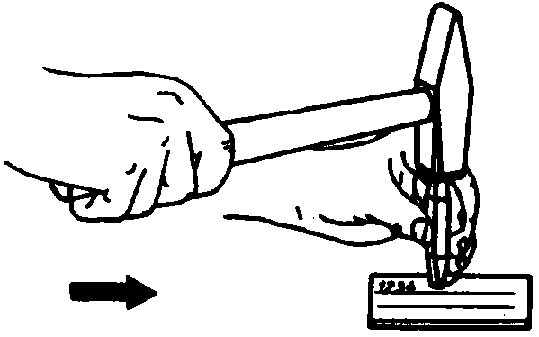
Figure 25 Marking in the direction of
blow to the front

Figure 26 Marking on a filed face of
a cylindrical workpiece
- When marking small workpieces a suitable hammering
support is to be selected!
Put round stock on a vee!
- If the face to be marked is uneven or not flat, it should be
smoothed or flattened’
How is scribing to be done for marking of combinations of
figures or letters?
_______________________________________________


