Back to Home
Page of CD3WD Project or Back to list of CD3WD Publications
 |  |  | Roadside Bio-Engineering - Site Handbook (DFID, 1999, 160 p.) |  |  | Section Three - Bio-engineering techniques | |  | (introduction...) | | | 3.1 Planted grass lines: contour/horizontal | | | 3.2 Planted grass lines: downslope/vertical | | | 3.3 Planted grass lines: diagonal | | | 3.4 Planted grasses: random planting | | | 3.5 Grass seeding | | | 3.6 Turfing | | | 3.7 Shrub and tree planting | | | 3.8 Shrub and tree seeding | | | 3.9 Large bamboo planting | | | 3.10 Brush layering | | | 3.11 Palisades | | | 3.12 Live check dams | | | 3.13 Fascines | | | 3.14 Vegetated stone pitching | | | 3.15 Jute netting (standard mesh) | | | 3.16 Jute netting (wide mesh) | | | 3.17 Mulching | | | 3.18 Vegetated gabions | | | 3.19 Live wattle fences | | | 3.20 Hydro-seeding |
|
Roadside Bio-Engineering - Site Handbook (DFID, 1999, 160 p.)
Section Three - Bio-engineering techniques
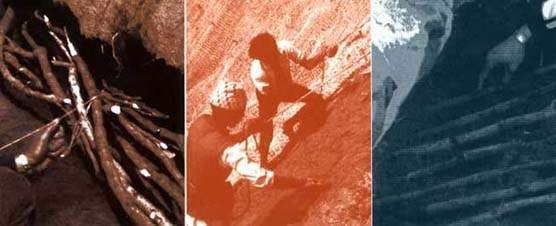
Figure
This section gives details of the design and construction of the
main bio-engineering systems used for stabilising slopes and controlling
erosion. These are:
· grass planting,
seeding and turfing (Section 3.1 to 3.6);
· shrub and tree planting and
seeding (Sections 3.7 and 3.8);
· large bamboo planting (Section
3.9);
· brush layering (Section 3.10);
· palisades (Section 3.11);
· live check dams (Section
3.12);
· fascine constructions (Section
3.1 3);
· vegetated stone pitching
(Section 3.14);
· jute netting: detailed
information on its use and construction: standard mesh (Section 3.15) and wide
mesh (Section 3.16);
· mulching: detailed information
on the use of mulch as an aid to bio-engineering (Section 3.1 7);
· vegetated gabions (Section
3.18);
· live wattle fences (Section
3.19);
· hydro-seeding (Section
3.20).
Details of all of the civil engineering measures used in
combination with these bio-engineering systems are given in Section
2.
3.1 Planted grass lines: contour/horizontal
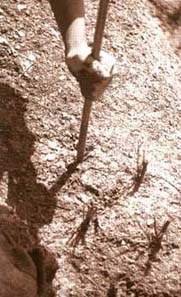
Planting grass lines. Use a
planting bar to make holes just big enough for the roots
Function
Grass slips (rooted cuttings), rooted stem cuttings or
clumps grown from seed are planted in lines across the slope. They protect the
slope with their roots and, by providing a surface cover, reduce the speed of
runoff and catch debris, thereby armouring the slope. The main engineering
functions are to catch, armour and reinforce.
Sites
Almost any slope less than 65°. This technique is mostly
used on dry sites, where moisture needs to be conserved. It is most widely used
on well-drained materials where increased infiltration is unlikely to cause
problems. On cultivated slopes less than 35°, horizontal lines planted at
intervals across the field can be used to avoid loss of soil and to help
conserve moisture, as a standard soil conservation measure. Planted grass lines
at intervals are essential if cultivation has to be carried out on slopes
greater than 35°.
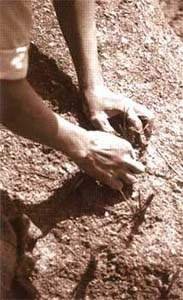
Place the grass into the hole,
taking care not to tangle the roots or have them curved back to the surface
Materials
· Grass plants
raised in a nursery or cuttings obtained elsewhere;
· Short planting bars;
· Line string;
·
Spirit level;
· Tape measure (30
metres);
· A means of transporting plants to
site;
· Hessian and water to keep the roots
moist;
· (Optional) Manure or
compost.

Fill the soil in around them,
firming it gently with your fingers
SPECIES SUITABLE FOR PLANTED GRASS LINES:
CONTOUR/HORIZONTAL
|
Local |
Botanical name |
Altitude |
Sites |
|
name |
|
range |
summary |
|
Amliso |
Thysanolaena maxima |
Terai -2000m |
Varied |
|
Babiyo |
Eulaliopsis binata |
Terai - 1500 m |
Hot and dry |
|
Dhonde |
Neyraudia reynaudiana |
Terai -1500 m |
Hot and dry |
|
Kans |
Saccharum spontaneum |
Terai - 2000 m |
Hot and dry; moist |
|
Katara khar |
Themeda species |
Terai - 2000 m |
Varied |
|
Khar |
Cymbopogon microtheca |
Terai - 2000 m |
Hot and dry; varied |
|
Khus |
Vetiveria lawsoni |
Terai - 1500 m |
Varied |
|
Narkat |
Arundo clonax |
Terai - 1500 m |
Hot and dry; varied |
|
Padang bans |
Himalayacalamus hookerianus |
1500 - 2500 m |
Moist |
|
Phurke |
Arunduella nepalensis |
700 - 2000 m |
Varied; stony |
|
Sito |
Neyraudia arundinacea |
Terai - 1500 m |
Varied |
|
Tite nigalo bans |
Drepanostachyum intermedium |
1000 - 2500 m |
Varied |
Spacing
Line spacing depends largely on the steepness of the slope.
Within rows: plants at 100 mm centres (except padang and tite
nigalo bans, which should be spaced at 500 mm centres)
Row spacings:
slope < 30°: 1000 mm;
slope 30-45°:
500 mm;
slope > 45°: 300 mm.
Where this technique is used on agricultural land, a compromise
must be reached between ease of cultivation and reduction of soil and water
movement. A vertical interval of 2 metres or more is generally adequate.
Construction steps
1 Prepare the site well in advance of planting.
Remove all debris and either remove or fill in surface irregularities so that
there is nowhere for erosion to start. If the site is on backfill material, it
should be thoroughly compacted, preferably when wet.
2 Always start grass planting at the top of the slope and work
downwards.
3 Mark out the lines with string, using a tape measure and
spirit level. Make sure the lines run exactly as required by the specification,
along the contour.
4 Split the grass plants out to give the maximum planting
material. Trim off long roots and cut the shoots off at about 100 mm above
ground level. Wrap the plants in damp hessian to keep them moist until they are
planted. Remember that you will need two slip cuttings per drill (planting hole)
if the grass is a fibrous rooting type (e.g. babiyo, kans, khar, phurke,
etc.) but only one if it is rhizomatous (e.g. amliso,
padang bans, etc.), and only one rooted stem cutting or seedling.
5 With a planting bar, make a hole just big enough for the
roots. Place the grass into the hole, taking care not to tangle the roots or
have them curved back to the surface. Fill the soil in around them, firming it
gently with your fingers. Take care to avoid leaving an air pocket by the roots.
6 If compost or manure are available, scatter a few handfuls
around the grasses. This is especially important on very stony sites, where
compost or manure can help to improve early growth. You may have to incorporate
it into the surface material to prevent it being washed off.
7 If it looks rather dry and there is no prospect of rain for a
day or two, consider watering the plants by hand.
Maintenance
This normally involves:
Protection (check on Kartik 1);
Weeding (check on
Shrawan 1, Bhadra 1 and Aswin 1);
Grass cutting (check on Poush
1).
Main functions
Contour grass lines catch material moving downslope. They also
armour slopes on highly impermeable materials by retarding runoff and
reinforcing slope materials.
Main limitations
Contour grass lines can increase the infiltration rate to the
point of liquefaction on poorly drained materials, particularly on steeply
sloping, fine-textured
debris.
3.2 Planted grass lines: downslope/vertical
Function
Grass slips (rooted cuttings), rooted stem cuttings or
seedlings are planted in lines running down the slope. They protect the slope
with their roots, provide a surface cover and help to drain surface water. They
do not catch debris. The main engineering functions are to armour, reinforce and
drain. Using this technique, a slope is allowed to develop a semi-natural
drainage system, gullying in a controlled way.
Sites
Almost any slope less than 65°. It is mostly used on damp
sites, where moisture needs to be shed. It is also most widely used on poorly
drained materials where an increase in infiltration can lead to liquefaction of
the soil.
Materials
· Grass plants
raised in a nursery or cuttings obtained elsewhere;
· Line string;
·
Triangular set square or frame with a plumb line;
· Spirit level;
·
Tape measure (30 metres);
· A means of
transporting plants to site;
· Hessian and
water to keep the roots moist;
·
(Optional) Manure or compost.
Vertical grass lines allow a slope
to develop a semi-natural drainage system, reducing infiltration and the
likelihood of liquefaction of the soil
Spacing
If the site is a newly cut slope, then a simple geometrical
pattern can be used. The normal spacing is as follows:
Within rows: plants at 100 mm centres (except padang
and tite nigalo bans, which should be spaced at 500 mm centres)
Row spacings: 500 mm.
SPECKS SUITABLE FOR PLANTED GRASS LINES:
DOWNSLOPE/VERTICAL
|
Local name |
Botanical name |
Altitude range |
Sites summary |
|
Amliso |
Thysanolaena maxima |
Terai - 2000 m |
Varied |
|
Babiyo |
Eulaliopsis binata |
Terai - 1500 m |
Hot and dry |
|
Dhonde |
Neyraudia reynaudiana |
Terai - 1500 m |
Hot and dry |
|
Kans |
Saccharum spontaneum |
Terai - 2000 m |
Hot and dry; moist |
|
Katara khar |
Themeda species |
Terai - 2000 m |
Varied |
|
Khar |
Cymbopogon microtheca |
Terai - 2000 m |
Hot and dry; varied |
|
Khus |
Vetiveria lawsoni |
Terai - 1500 m |
Varied |
|
Narkat |
Arundo clonax |
Terai - 1500 m |
Hot and dry; varied |
|
Padang bans |
Himalayacalamus hookerianus |
1500 -2500m |
Moist |
|
Phurke |
Arunduella nepalensis |
700 - 2000 m |
Varied; stony |
|
Sito |
Neyraudia arundinacea |
Terai - 1500 m |
Varied |
|
Tite nigalo bans |
Drepanostachyum intermedium |
1000 -2500m |
Varied |
However, if a gully system has already partly developed, then
the spacing is defined naturally. Lines of grass should not be more than 500 mm
apart if possible and, if ridges are bigger, a series of small lines in a
chevron pattern (<<<<<) is required to protect gaps. Careful
supervision is required on site to ensure that all planted lines follow the
direction of natural fall.
Construction steps
1 Prepare the site well in advance of planting.
Remove all debris and either remove or fill in surface irregularities so that
there is nowhere for erosion to start.
2 Always start grass planting at the top of the slope and work
downwards.
3 Mark out the lines with string, using a tape measure. Use the
spirit level, string and set square, or the frame to check the maximum line of
fall. Make sure the lines run exactly as required by the specification, down the
slope or drainage line.
4 Split the grass plants out to give the maximum planting
material. Trim off long roots and cut the shoots off at about 100 mm above
ground level. Wrap the plants in damp hessian to keep them moist until they are
planted. Remember that you will need two slip cuttings per drill (planting hole)
if the grass is a fibrous rooting type (e.g. babiyo, kans, khar, phurke,
etc.) but only one if it is rhizomatous (e.g. amliso,
padang bans, etc.), and only one rooted stem cutting or seedling.
5 With a planting bar, make a hole just big enough for the
roots. Place the grass into the hole, taking care not to tangle the roots or
have them curved back to the surface. Fill the soil in around them, firming it
gently with your fingers. Take care to avoid leaving an air pocket by the roots.
Mound the soil along the grass line, to encourage water to run mid way between
the lines rather than close to the plant stems.
6 If compost or manure is available, scatter a few handfuls
around the grasses. This is important on very stony sites, where it can help to
improve early growth. You may have to incorporate it into the surface material
to prevent it being washed off.
7 If it looks rather dry and there is no prospect of rain for a
day or two, consider watering the plants by hand.
Maintenance
This normally involves:
Protection (check on Kartik 1);
Weeding (check on
Shrawan 1, Bhadra 1 and Aswin 1);
Grass cutting (check on Poush
1).
If gullies develop, they must be controlled. If they become
large enough to endanger the site, they must be checked with dry stone pitching
and small check dams. If caught early enough, a few stones may be all
that is required to create an armoured rill in which the runoff can
safely pass. If allowed to grow too big, much more work will be required.
Main functions
Downslope grass lines provide the maximum amount of surface
drainage by channeling runoff and minimising infiltration. They still armour
against erosion and reinforce the slope.
Main limitations
On impermeable materials, runoff can become damaging. In drier
sites, grass plants can suffer from drought due to the increased drainage. On
some weak materials, rills can develop down the side of the plant line, damaging
the grass slips and reducing their
growth.
3.3 Planted grass lines: diagonal
Function
Grass slips (rooted cuttings), rooted stem cuttings or
seedlings are planted in lines running diagon-ally across the slope. They armour
the slope with their roots and by providing a surface cover. They have limited
functions of catching debris and draining surface water. The main engineering
functions are to armour and reinforce, with secondary functions to catch and
drain. This technique offers the best compromise of the grass line planting
systems in many situations.
Sites
Almost any slope less than 65°. It is mostly used on poorly
drained materials where an increase in infiltration can lead to liquefaction of
the soil. It is also useful on damp sites, where moisture needs to be shed. It
should be used whenever there is doubt as to which grass line planting system
should be used, as a result of uncertainties over site environmental
characteristics or material properties.
Materials
· Grass plants
raised in a nursery or cuttings obtained elsewhere;
· Line string;
·
Tape measure (30 metres);
· Triangular set
square or frame with a plumb line (optional);
· Spirit level (optional);
· A means of transporting plants to site;
· Hessian and water to keep the roots moist;
· (Optional) Manure or compost.
Spacing
If the site is a newly cut slope, then a simple geometrical
pattern can be used. The normal spacing is as follows:
Within rows: plants at 100 mm centres (except padang
and tite nigalo bans, which should be spaced at 500 mm centres)
Row spacings: 500 mm.
However, if a gully system has already partly developed, then
the spacing is defined naturally. Lines of grass should not be more than 500 mm
apart if possible and, if ridges are bigger, a series of small lines in a
chevron (<<<<<) or herringbone (¬¬¬¬¬) formation is required to protect gaps.
Construction steps
1 Prepare the site well in advance of planting.
Remove all debris and either remove or fill in surface irregularities so that
there is nowhere for erosion to start.
2 Always start grass planting at the top of the slope and work
downwards.
3 Mark out the lines with string using a tape measure. Make sure
they run exactly as required by the specification, diagonally across the slope
or towards drainage lines. It may help to use a spirit level and set square or
frame to check the maximum line of fall.
4 Split the grass plants out to give the maximum planting
material. Trim off long roots and cut the shoots off at about 100 mm above
ground level. Wrap the plants in damp hessian to keep them moist until they are
planted. Remember that you will need two slip cuttings per drill (planting hole)
if the grass is a fibrous rooting type (e.g. babiyo, kans, khar, phurke,
etc.) but only one if it is rhizomatous (e.g. amliso, padang bans,
etc.), and only one rooted stem cutting or seedling.
5 With a planting bar, make a hole just big enough for the
roots. Place the grass into the hole, taking care not to tangle the roots or
have them curved back to the surface. Fill the soil in around them, firming it
gently with your fingers. Take care to avoid leaving an air pocket by the roots.
6 If compost or manure is available, scatter a few handfuls
around the grasses. If the site is very stony, this is important for improving
early growth. You may have to incorporate it into the surface material to
prevent it being washed off.
7 If it looks rather dry and there is no prospect of rain for a
day or two, consider watering the plants by hand.
SPECIES SUITABLE FOR PLANTED GRASS LINES: DIAGONAL
|
Local name |
Botanical name |
Altitude range |
Sites summary |
|
Amliso |
Thysanolaena maxima |
Terai - 2000 m |
Varied |
|
Babiyo |
Eulaliopsis binata |
Terai - 1500 m |
Hot and dry |
|
Dhonde |
Neyraudia reynaudiana |
Terai - 1500 m |
Hot and dry |
|
Kans |
Saccharum spontaneum |
Terai - 2000 m |
Hot and dry; moist |
|
Katara khar |
Themeda species |
Terai - 2000 m |
Varied |
|
Khar |
Cymbopogon microtheca |
Terai - 2000 m |
Hot and dry; varied |
|
Khus |
Vetiveria lawsoni |
Terai - 1500 m |
Varied |
|
Narkat |
Arundo clonax |
Terai - 1500 m |
Hot and dry; varied |
|
Padang bans |
Himalayacalamus hookerianus |
1500 - 2500 m |
Moist |
|
Phurke |
Arunduella nepalensis |
700 - 2000 m |
Varied; stony |
|
Sito |
Neyraudia arundinacea |
Terai - 1500 m |
Varied |
|
Tite nigalo bans |
Drepanostachyum intermedium |
1000 - 2500 m |
Varied |
Maintenance
This normally involves:
Protection (check on Kartik 1);
Weeding (check on
Shrawan 1, Bhadra 1 and Aswin 1);
Grass cutting (check on Poush
1).
Main functions
Diagonal grass lines armour and reinforce slopes effectively,
and can also drain and catch material moving down the slope. This system appears
to combine the best features of both horizontal and vertical planting in the
majority of sites.
Main limitations
Where the specific advantages of contour or downslope planting
patterns are critical, diagonal planting should not be used. On certain very
weak materials, small rills can develop down the
slope.
3.4 Planted grasses: random planting
Function
Grass slips (rooted cuttings), rooted stem cuttings or
seedlings are planted at random on a slope, to an approximate specified density.
They armour and reinforce the slope with their roots and by providing a surface
cover. They also have a limited function of catching debris. This technique is
most commonly used in conjunction with standard mesh jute netting, where
complete surface protection is needed on very steep, harsh slopes. In most other
cases, however, the advantages of one of the grass line planting systems
(i.e. contour, downslope or diagonal) offer better protection to the
slope.
Sites
Almost any slope less than 60° that allows grass planting.
Normally used only on sites where jute netting (standard mesh) has already been
applied. This implies slopes steeper than 45° and less than 15 metres in
length, where moisture is not a serious problem.
Materials
· Grass plants
raised in a nursery or cuttings obtained elsewhere;
· Short planting bars;
· A means of transporting plants to site;
· Hessian and water to keep the roots moist;
· (Optional) Manure or compost.
Spacing
Plants should be at an average of 100 mm centres (i.e.
100 plants per square metre). No gap should exceed 200 mm.
Construction steps
1 Apply the jute netting (standard mesh) well in
advance of the monsoon, as described in Section 3.15. Start the grass planting
as soon as the rains allow. If the site has not been treated with jute netting,
prepare it well in advance of planting: remove all debris and either remove or
fill in surface irregularities so that there is nowhere for erosion to start.
2 Always start grass planting at the top of the slope and work
downwards. Workers should stand on the pegs holding the netting, not on the
netting itself.
3 Split the grass plants out to give the maximum planting
material. Trim off long roots and cut the shoots off at about 100 mm above
ground level. Wrap the plants in damp hessian to keep them moist until they are
planted. Remember that you will need two slip cuttings per drill (planting hole)
if the grass is a fibrous rooting type (e.g. babiyo, kans, khar, phurke,
etc.) but only one if it is rhizomatous (e.g. amliso,
padang bans, etc.), and only one rooted stem cutting or seedling.
4 With a planting bar, make a hole just big enough for the
roots. Place the grass into the hole, taking care not to tangle the roots or
have them curved back to the surface. Fill the soil in around them, firming it
gently with your fingers.
5 Plant grasses at random over the surface, but aim for an
average spacing of 100 mm centres (i.e. 100 plants per square metre). No gap
should be greater than 200 mm.
6 If compost or manure is available, scatter a few handfuls
around the grasses.
7 If it looks rather dry and there is no prospect of rain for a
day or two, consider watering the plants by hand.
Maintenance
This normally involves:
Protection (check on Kartik 1);
Weeding (check on
Shrawan 1, Bhadra 1 and Aswin 1);
Grass cutting (check on Poush
1).
Main functions
Random grass planting armours and reinforces slopes effectively.
This is particularly the case when it is used in conjunction with standard mesh
jute netting.
Main functions and limitations
Where the specific advantages of contour, downs-lope or diagonal
planting patterns are critical, random planting should not be used.
SPECIES SUITABLE FOR PLANTED GRASSES: RANDOM PLANTING
|
Local name |
Botanical name |
Altitude range |
Sites summary |
|
Amliso |
Thysanolaena maxima |
Terai - 2000 m |
Varied |
|
Babiyo |
Eulaliopsis binata |
Terai - 1500 m |
Hot and dry |
|
Dhonde |
Neyraudia reynaudiana |
Terai - 1500 m |
Hot and dry |
|
Kans |
Saccharum spontaneum |
Terai - 2000 m |
Hot and dry; moist |
|
Katara khar |
Themeda species |
Terai - 2000 m |
Varied |
|
Khar |
Cymbopogon microtheca |
Terai - 2000 m |
Hot and dry; varied |
|
Khus |
Vetiveria lawsoni |
Terai - 1500 m |
Varied |
|
Narkat |
Arundo clonax |
Terai - 1500 m |
Hot and dry; varied |
|
Phurke |
Arunduella nepalensis |
700 - 2000 m |
Varied; stony |
|
Sito |
Neyraudia arundinacea |
Terai - 1500 m |
Varied |
3.5 Grass seeding
Function
Grass is sown directly on to the site. It allows easy vegetation
coverage of large areas. This technique is often used in conjunction with
mulching and jute netting to aid establishment. The main engineering functions
are to armour and, later, to reinforce.
Sites
Almost any bare site with slopes up to 45°. Grass seeding
is mostly used on well-drained materials, where increased infiltration does not
give rise to problems.
Materials
· A supply of a
carefully chosen grass seed;
· Tools to
scarify the surface to be sown;
·
Mulch (cut plant material) or hessian sheeting to cover the seed once sown (see
Section 3.17).
· On slopes of 30° to
45°, wide mesh jute netting will be required to hold the mulch in place on
the slope (see Section 3.16).
SPECIES SUITABLE FOR GRASS SEEDING
|
Local name |
Botanical name |
Altitude range |
Sites summary |
|
Babiyo |
Eulaliopsis binata |
Terai - 1500 m |
Hot and dry |
|
Dhonde |
Neyraudia reynaudiana |
Terai - 1500 m |
Hot and dry |
|
Kans |
Saccharum spontaneum |
Terai - 2000 m |
Hot and dry; moist |
|
Katara khar |
Themeda species |
Terai - 2000 m |
Varied |
|
Khar |
Cymbopogon microtheca |
500 - 2000 m |
Hot and dry; varied |
|
Phurke |
Arunduella nepalensis |
700 - 2000 m |
Varied; stony |
|
Sito |
Neyraudia arundinacea |
Terai - 1500 m |
Varied |

In grass seeding, spread the seeds
or grass seed heads liberally over the slope. Ideally, the whole surface should
be very lightly covered in seed material
Construction steps
1 Well in advance of the date of sowing, prepare the
site. Remove all irregularities likely to allow slumps or gullies and clean
loose debris away.
2 Immediately before sowing, scarify the surface of the slope.
This means scratching the surface or carrying out basic cultivation to give a
loose surface into which the germinating grass seeds can send their roots.
3 Start sowing from the top of the slope and work downwards.
Spread the seeds or grass seed heads liberally over the slope. Ideally, the
whole surface should be very lightly covered in seed material. An application
rate of 25 grammes per square metre is normal.
4 Cover the seeds completely with a layer of mulch, made from
cut herbs such as ban mara (Eupatorium adenophorum), or with hessian
sheeting. A vegetation mulch is preferable. Wide mesh jute netting (150 mm
× 500 mm mesh size) should be used to hold mulch on to the surface if the
slope is greater than 30°.
Maintenance
This normally involves:
Protection (check on Kartik 1);
Weeding (check on
Shrawan 1, Bhadra 1 and Aswin 1);
Grass cutting (check on Poush
1).
Main functions
Grass seeding armours surfaces effectively: it can be used to
create an even cover over all surfaces. It reinforces slopes after a few years
of growth.
Main limitations
This technique gives none of the structural advantages of grass
slip planting. Plants take longer to develop from seeds than from slips. Very
heavy rain in the days immediately after sowing can lead to seeds being washed
off the slope, or to damage to the very small
seedlings.
3.6 Turfing
Function
Turf, consisting of a shallow rooting grass and the soil it is
growing in, is placed on the slope. A technique commonly used on gentle
embankment slopes. Its only engineering function is to armour.
Sites
This technique can be used on any gently sloping site (less than
30°). It is normally used on well-drained materials, where there is a
minimal risk of slumping
Materials
· Flat shovel with a
sharp edge to cut the turf;
· Old khukuri to
cut the turf to shape;
· Water to keep the
turf moist;
· Wooden rammer
(mungro);
· If the slope to be turfed is
greater than about 25°, wooden pegs about 300 mm long and 30 mm in diameter
will be required.
SPECIES SUITABLE FOR TURFING
|
Local name |
Botanical name |
Altitude range |
Sites summary |
|
Dubo |
Cynodon dactylon |
Terai - 1800 m |
Varied |
Construction steps (making turf)
Turf should be cut the same day as it is to be placed; if this
is not possible, it should be kept very moist in a shady place. To cut the turf:
1 Mark out with lines the size and shape to be cut
(300 mm square is easy to manage but 300 × 600 mm is better);
2 Cut the sides of the shapes with a khukuri, to at least 50-mm
depth;
3 Using a broad, flat shovel with a sharp edge, cut horizontally
under the shapes and lift them out.
If the ground where the turf is to be taken from is hard and
dry, it may be helpful to water it thoroughly the day before cutting.

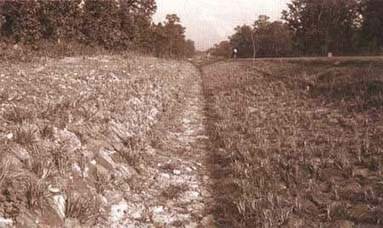
Turfing provides instant surface
protection, as used on this road shoulder (the embankment has been treated with
grass lines and brush layering)
Construction steps (placing the turf)
1 Well in advance of the turfing operation,
thoroughly smooth the surface to be covered. It is most important to obliterate
all irregularities;
2 If the slope to be turfed is a gravel-fill embankment, then a
50-mm layer of topsoil should be laid and compacted by hand;
3 Immediately before placing the turf, scarify the ground
surface slightly and water it well if it is not already moist;
4 Place the turf, taking care to fit the pieces together with no
gaps between. Use the khukuri to cut the pieces to shape;
5 If the slope is steeper than about 25°, wooden pegs
should be hammered through the turf to stop it sliding;
6 Once the slope has been satisfactorily covered, compact the
turf with the wooden rammer.
7 Finally, water the fresh turf thoroughly.
Maintenance
This normally involves:
Protection (check on Kartik 1);
Grass cutting
(check on Poush 1).
Main functions
Turfing armours slopes: it gives a complete instant surface
cover.
Main limitations
Turfing is relatively costly, and creates equal bare areas at
the source of the turf, where erosion can start. For this reason its use needs
to be restricted in hill areas. In addition, there is a discontinuity between
the turf and the underlying material which, in extreme conditions, can give rise
to gradual creep or a shallow planar failure. Because turfing has to be carried
out using the small grass dubo, there are no higher plants to discourage animal
tramping, so damage can be caused by this
means.
3.7 Shrub and tree planting
Function
Shrubs or trees are planted at regular intervals on the slope.
As they grow, they create a dense network of roots in the soil. The main
engineering functions are to reinforce and, later, to anchor. In the long term,
large trees can also be used for slope support.
Sites
This method can be used without adverse effects on almost any
slope up to 30°. With care, it can be used on slopes between 30° and
45°. It can be used on any material and in any site.
Materials
· Plants raised in a
nursery, usually as polypot seedlings;
·
Tools to dig holes and a means of transporting the plants to site;
· (Optional) Compost.
Spacing
The spacing of plants is important. The main considerations are
cost and the speed with which a full cover is required. In most bio-engineering
sites a spacing of 1 × 1 metre is necessary, requiring 10,000 plants per
hectare. Plants should be planted in off-set rows unless a different pattern is
needed for specific bio-engineering requirements.
Construction steps
1 Prepare the site well in advance of planting.
Remove all debris and remove or fill surface irregularities. If the site is on
backfill material, thoroughly compact it, preferably when it is wet. Cut all
weeds.
2 If possible, dig pits for the shrubs or trees well in advance
of the planting programme, but refill them the same day. Pits should be 300 mm
deep and 300 mm in diameter if this is possible without causing excessive damage
to the slope.
3 When the ground is wet enough to support reasonable growth,
plant out the seedlings. The bigger the hole made, the better it is for the
plant; but there must be a compromise between helping the plant and avoiding
excessive disturbance to the slope.
4 Carefully remove the polypot by slicing it down the side with
a razor blade or tear it carefully along the fold. Take care not to cut the
roots.
5 Plant the seedling in the pit, filling the soil carefully
around the cylinder of roots and soil from the polypot. Ensure there are no
cavities. Firm the soil all around the seedling with gentle foot pressure.
6 If available, mix a few handfuls of well-rotted compost with
the soil around the roots when you are backfilling the hole.
7 Remove any weeds around the plant. Add mulch around the
seedling, but with a slight gap so that it does not touch the stem.
SPECIES SUITABLE FOR SHRUB AND TREE PLANTING
|
Local name |
Botanical name |
Altitude range |
Sites summary |
|
Shrubs |
|
|
|
|
Areri |
Acacia pennata |
500 - 1500 m |
Hot and dry; harsh |
|
Dhanyero |
Woodfordia fruticosa |
Terai - 1500 m |
Hot and dry; harsh |
|
Dhusun |
Colebrookea oppositifolia |
Terai - 1000 m |
Hot and dry; harsh |
|
Kanda phul |
Lantana camara |
Terai - 1750 m |
Hot and dry |
|
Keraukose |
Indigofera atroturpurea |
Terai - 2000 m |
Hot and dry; harsh |
|
Tilka |
Wendlandia puberula |
Terai - 1500 m |
Hot and dry; harsh |
|
Trees |
|
|
|
|
Bakaino |
Melia azedarach |
Terai - 1800 m |
Hot and dry; harsh |
|
Chilaune |
Schima wallichii |
900 - 2000 m |
Varied; dry - moist |
|
Gobre salla |
Pinus wallichiana |
1800 - 3000 m |
Dry; varied |
|
Kalo siris |
Albizia lebbeck |
Terai - 1200 m |
Hot and dry; harsh |
|
Kbanyu (khosro) |
Ficus semicordata |
Terai - 2000 m |
Hot and dry; varied |
|
Khayer |
Acacia catechu |
Terai - 1000 m |
Hot and dry; harsh |
|
Lankuri |
Fraxinus floribunda |
1200 - 2700 m |
Varied; moist best |
|
Painyu |
Prunus cerasoides |
500 - 2400 m |
Varied/dry; stony |
|
Rani (khote) salla |
Pinus roxburghii |
500 - 1950 m |
Hot and dry; varied |
|
Rato siris |
Albizia julibrissin |
800 - 3000 m |
Varied and moist |
|
Seto siris |
Albizia procera |
Terai - 1350 m |
Moist |
|
Sisau |
Dalbergia sissoo |
Terai - 1400 m |
Varied |
|
Utis |
Alnus nepalensis |
900 - 2700 m |
Varied and moist |

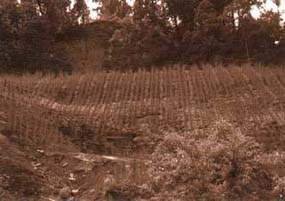
This eight-year old utis
plantation, raised from polypot seedlings, is established enough to reinforce
and anchor the roadside slope
Maintenance
This normally involves:
Protection (check on Kartik 1);
Weeding (check on
Shrawan 1, Bhadra 1 and Aswin 1);
Thinning (check on Kartik 1, starting three
years after site works).
Main functions
Planting shrubs and trees reinforces and anchors the slope by
establishing a community of larger plants.
Main limitations
Seedlings take about five years to contribute significantly to
slope strengthening. Care and protection are required in the first three
years.
3.8 Shrub and tree seeding
Function
Shrub (or tree) seeds are applied directly
to the site. This technique allows very steep, rocky and unstable slopes to be
revegetated where cuttings and seedlings cannot be planted. There are two
methods: (1) direct sowing and (2) broadcasting. In the first, seeds are
placed individually, whereas the second involves throwing the seed all over the
site. The main engineering functions are to reinforce and, later, to anchor.
Sites
Any steep, rocky or unstable sites. This technique is
particularly useful on fractured rock slopes where normal planting cannot be
done. Direct sowing can be practised on very steep slopes (i.e. up to
about 60°) and it is rarely necessary to use this technique on slopes more
gentle than 45°. Broadcasting seeds can be carried out on any slopes up to
45°, but is usually less successful on slopes steeper than 30°.
Materials
· A supply of the
seeds to be sown;
· Small planting bars (if
direct seeding).
Construction steps: direct seeding
The sowing of shrub seeds directly into the material of the
site. Choose larger seeds such as areri or bhujetro.
1 In advance of the sowing programme, clear all very
loose debris from the site.
2 Start seeding from the top of the slope and move downwards.
Make a small hole, a little bigger than the seed, using a planting bar.
3 Push the seed right into the hole and cover it with soil; or,
if it is in a rocky crevice, check that it is right out of direct sunlight. Make
sure that the seed coat is not damaged in this process.
Construction steps: broadcasting
The sowing of tree and shrub seeds by throwing them over the
site. It is normal to choose small seeds such as khanyu or utis, although larger
seeds can be used as well.
1 In advance of the sowing programme, clear all very
loose debris from the site.
2 Any smooth surfaces should be scarified to give a rough,
looser surface for the seed to be held on and put roots into.
3 Throw the seeds on to the surface of the slope, ensuring that
they do not blow away or slide down into concentrated masses in crevices and
rills.
Spacing
Seeds are normally sown or broadcast to give a coverage of one
plant every 250 mm, centre to centre. The actual seeding rate should be
increased to three seeds for every plant required to give a reasonable survival
rate.
Maintenance
This normally involves:
Protection (check on Kartik 1);
Weeding (check on
Shrawan 1, Bhadra 1 and Aswin 1);
Thinning (check on Kartik 1, starting three
years after site works).
SPECIES SUITABLE FOR SHRUB AND TREE SEEDING
Main species used for direct seeding
|
Local name |
Botanical name |
Altitude range |
Sites summary |
|
Shrubs |
|
|
|
|
Areri |
Acacia pennata |
500 - 1500 m |
Hot and dry; harsh |
|
Bhujetro |
Butea minor |
500 - 1500 m |
Hot and dry; harsh |
|
Keraukose |
Indigofera atroturpurea |
|
Hot and dry; harsh |
Main species used for broadcasting
|
Local name |
Botanical name |
Altitude range |
Sites summary |
|
Shrubs |
|
|
|
|
Areri |
Acacia pennata |
500 - 1500 m |
Hot and dry; harsh |
|
Bhujetro |
Butea minor |
500 - 1500 m |
Hot and dry; harsh |
|
Keraukose |
Indigofera atroturpurea |
Terai - 2000 m |
Hot and dry; harsh |
|
Trees |
|
|
|
|
Bakaino |
Melia azedarach |
Terai - 1800 m |
Hot and dry; harsh |
|
Gobre salla |
Pinus wallichiana |
1800 - 3000 m |
Dry; varied |
|
Khanyu (khosro) |
Ficus semicordata |
Terai - 2000 m |
Hot and dry; varied |
|
Khayer |
Acacia catechu |
Terai - 1000 m |
Hot and dry; harsh |
|
Rani (khote) salla |
Pinus roxburghii |
500 - 1950 m |
Hot and dry; varied |
|
Sisau |
Dalbergia sissoo |
Terai - 1400 m |
Varied |
|
Utis |
Alnus nepalensis |
900 - 2700 m |
Varied and moist |
Main functions
Seeding shrubs and trees reinforces and anchors any slope,
however rocky, by establishing a community of larger plants.
Main limitations
Seedlings take about five years to contribute significantly to
slope strengthening. Protection is required in the first few
years.
3.9 Large bamboo planting
Function
Large bamboos can reduce movement of material and
stabilise slopes. Large bamboos are usually planted by one of two methods: (1)
the traditional planting method or (2) to plant rooted culm cuttings from
a nursery. Large clumps of the larger stature bamboos are one of the most
substantial vegetation structures available to reinforce and support a slope.
However, they do not have deeply penetrating roots and so do not have an
anchoring function; also, they can surcharge upper slope areas.
Sites
Mostly used at the base of slopes and in gullies, where the
slope segment has an angle of less than 30°. Any fill site can be planted.
Bamboos do not thrive on very dry or excessively stony sites.
SPECIES SUITABLE FOR LARGE BAMBOO PLANTING
|
Local name |
Botanical name |
Altitude range |
Sites summary |
|
Traditional planting method only |
|
|
|
Mal bans |
Bambusa nutans |
Terai - 1500 m |
Dry/varied |
|
Nibha/ ghopi/ lyas bans |
Ampelocalamus patellaris |
1200 - 2000 m |
Varied |
|
Tharu bans |
Bambusa nutans |
Terai - 1500 m |
Varied |
Either traditional planting method or rooted single-node culm
cutting method
|
Choya/ tama bans |
Dendroclamus hamiltonii |
300 - 2000 m |
Moist |
|
Dhanu bans |
Bambusa balcooa |
Terai - 1600 m |
Varied |
|
Kalo bans |
Dendrocalamus hookeri |
1200 - 2500 m |
Varied |
Materials
· For the
traditional method; one-year-old rhizomes and 2-2.5 metres of culm, removed from
the clump carefully with minimal damage to the roots;
· For the rooted culm cutting
method, rooted single-node culm cuttings from a nursery;
· Hessian and water to wrap
around the root ball to keep it moist;
· A means of transporting the
cutting to the planting site;
· Tools to dig a hole for
planting;
· Material for mulching after
planting;
· For the traditional method,
the upper sections of the culm should be kept to support the cutting once it has
been planted.
Spacing
Planting large bamboos is so much bigger a job than with other
plants that it is almost impossible to plant too many. However, they should
never be planted closer than 2 metres apart across a slope and perhaps 5 metres
up and down the slope.
Construction steps: traditional method
The traditional planting method for bamboos is well known
throughout the hills and Terai. It involves taking a very large rhizome and culm
cutting. Source clumps should be identified well in advance and an agreement
reached with the owners. This method can be used for any bamboo species.
1 Remove all loose debris from the site and prepare
the surface well in advance of the planting day;
2 Select a suitable culm near the edge of the parent clump and
dig out the rhizome carefully. Cut off the culm about 2 metres above ground
level. Cut the rhizome where it branches from the main plant, taking great care
not to damage the buds and small roots;
3 Wrap the root ball in damp hessian and transport the big
cutting to site for planting on the same day;
4 Dig a large hole (at least five times the size of the
cutting's rhizome) and plant the rhizome either upright or at right angles to
the slope. Carefully backfill the hole and firm the soil as much as possible;
5 Mulch well the disturbed and surrounding soil.
6 Form a depression around the roots to act as a water
collection area. If possible, water it thoroughly;
7 (Optional) If available, use two pieces from the higher
part of the culm to make a tripod structure with the planted piece. Lash them
together with jute string (not wire) as high as possible. This holds the plant
much more firmly when disturbed by grazing animals.
A stand of large bamboos can catch
debris and support the base of a slope
Construction steps: rooted culm cutting method
This is suitable for many large bamboos that have heavy
branching. It can be used for choya/tama bans, dhanu bans and kalo bans. It
requires a rooted culm cutting brought from a nursery (see Section 4.6 for
details on this).
1 Keep the root ball wrapped in wet hessian until
you are ready to plant it, so that it does not dry out.
2 Remove all the loose debris from the site and carry out any
other site preparation well in advance of the planting day.
3 Dig a sufficiently large hole and plant the cutting in it.
4 Carefully backfill the hole, making sure that you do not
damage buds at the base of the cutting. Firm the soil.
5 Place a layer of mulch over the disturbed soil and the
surrounding area.
6 Form a depression around the roots to act as a water
collection area;
7 Water thoroughly.
Maintenance
This normally involves:
Protection (check on Kartik 1);
Watering in the
first year (check weekly in Chaitra, Baisakh and Jestha);
Mulching in the
first two years (check on Mangsir 1).
Main functions
Large bamboos support the base of a slope by establishing a very
strong line of plants. With their multiple stems, they catch debris moving down
the slope.
Main limitations
Bamboos take about five years to contribute significantly to
slope strengthening. Protection is required in the early years. This technique
cannot be used in most in hot, dry sites, since bamboos generally require cool,
moist sites. Bamboos planted in steep upper slope situations are prone to
slumping some years (seven or more) after
planting.
3.10 Brush layering
Function
Woody cuttings (or hardwood cuttings) are laid in lines
across the slope, usually following the contour. These form a strong barrier,
preventing the development of rills, and trap material moving down the
slope. In the long term, a small terrace will develop. The main engineering
functions are to catch debris, and to armour and reinforce the slope. In certain
locations, brush layers can be angled to provide a drainage function.
SPECIES SUITABLE FOR BRUSH LAYERING
|
Local name |
Botanical name |
Altitude range |
Sites summary |
|
Assuro |
Adhatoda vasica |
Terai - 1000 m |
Varied |
|
Bainsh |
Salix tetrasperma |
Terai - 2700 m |
Moist |
|
Dabdabe |
Garuga pinnata |
Terai - 1300 m |
Varied and dry |
|
Kanda phul |
Lantana camara |
Terai - 1750 m |
Hot and dry |
|
Namdi phul |
Colquhounia coccinea |
1000 - 2000 m |
Varied |
|
Phaledo |
Erythrina species |
900 - 3000 m |
Varied |
|
Saruwa/ bihaya |
Ipomoea fistulosa |
Terai - 1500 m |
Varied; hot or wet |
|
Simali |
Vitex negundo |
Terai - 1750 m |
Hot and dry; varied |
Brush layering. Lay the first
layer of cuttings along the terrace, with a 50 mm interval between the cuttings
(see also step 4);
Brush layering. A second layer of
cuttings is placed on top (step 6);
Brush layering. Layers are
positioned at 1 to 2-metre intervals up the slope (step 8);
Brush layering. In the long term,
small terraces develop
Sites
This technique can be used on a wide range of sites up to about
45°. It is particularly effective on debris sites, fill slopes and high
embankments. Avoid using the technique on materials that are poorly drained and
are subject to high rates of small-scale slumping (see Section 3.13, Fascines,
which may be more appropriate for poorly drained sites).
Materials
· Cuttings made from
woody material that is 6 to 18 months old. They should be 20 to 40 mm in
diameter and 450 to 600 mm long. When taking the cuttings, cut the top at right
angles to the stem and the bottom at 45° to make it clear as to which way
it should be inserted. If possible, take the cuttings the same day that they are
to be planted.
· Hessian and water to keep the
cuttings moist until planting.
· Shovels and pick axes to make
the trenches for planting.
· Line string.
· Tape measure (30 metres).
· For brush layering on gravel
fill embankments, a supply of forest topsoil at the rate of 1 cu. m per 20
metres of layering.
Spacing
Spacing between brush layers depends on the steepness of the
slope. The following spaces should be used.
|
Slope less than 30° |
2 m interval; |
|
Slope 30 to 45° |
1 m interval. |
Within the brush layers, cuttings should be at 50 mm centres, in
the double layer described above. A wider gap than this is acceptable on gentle
slopes, but on steep slopes this spacing is required to give adequate
protection.
Construction steps
1 Using string, mark the lines to be planted,
starting 500 mm from the base of the slope.
2 Always install brush layers from the bottom of the slope, and
work upwards.
3 Form a small terrace, with a 20 percent fall back into the
slope. The terrace should be 400 mm wide. If you are brush layering a
gravel-filled road embankment you should lay a 50 mm thick layer of soil along
this terrace to improve rooting conditions.
4 Lay the first layer of cuttings along the terrace, with a 50
mm interval between the cuttings. Leave at least one bud and up to one-third of
the cuttings sticking beyond the terrace edge and the rest inside. The branch
growing tips should point towards the outside of the terrace.
5 Lay a 20 mm-thick layer of soil in between the cuttings to
provide a loose cushion.
6 Lay a second layer of cuttings on top of this, staggered with
the first layer. On a gravel-filled embankment slope lay an 80 mm layer of soil
over the cuttings before you do any backfilling.
7 Partly backfill the terrace with the excavated materials. This
should not be more than 50 mm thick.
8 Mark a line 1 metre above the first brush layer and set the
string for the next layer.
9 Follow steps 3 to 7. As the next terrace is cut, always fill
the lower bench with the material excavated from above and compact it reasonably
well by gentle foot pressure.
Good site supervision is essential to ensure that lines run
along the contours and do not concentrate runoff; also to make sure that
cuttings are not allowed to dry in the sun. Well-buried cuttings have a higher
survival rate.
Maintenance
Since the spacing of plants recommended here is very dense,
there is unlikely to be a need for replacing failures, but some thinning of the
trees or shrubs may be required after a few years. The main maintenance checks
should be as follows.
Protection (check on Kartik 1);
Weeding (check on
Shrawan 1, Bhadra 1 and Aswin 1);
Thinning (check on Kartik 1, starting three
years after site works).
Main functions
Brush layering armours and reinforces the slope; it catches
debris; and, if angled, it helps to drain the slope. Brush layers provide a very
strong and low-cost barrier, especially on debris slopes, however loose.
Main limitations
The main limitation is that construction gives rise to a
considerable level of disturbance to the
slope.
3.11 Palisades
Function
Woody (or hardwood) cuttings are planted in lines across
the slope, usually following the contour. These form a strong barrier and trap
material moving down the slope. In the long term, a small terrace will develop.
The main engineering functions are to catch debris, and to armour and reinforce
the slope. In certain locations, palisades can be angled to give a drainage
function.
Sites
This technique can be used on a wide range of sites up to about
60°. It is particularly effective on steep landslide debris slopes.
Materials that are poorly drained and are subject to high rates of small-scale
slumping should be avoided (see Section 3.13, Fascines, which may be more
appropriate for poorly drained sites of up to 45°).
Materials
· Cuttings made from
woody material that is 6 to 18 months old. They should be 20 to 40 mm in
diameter and 300 to 500 mm long. Cut the tops at right angles to the stems and
cut the bottom at 45°; it is then clear as to which way each cutting should
be inserted. If possible, take the cuttings the same day that they are to be
planted.
· Hessian and water to keep the
cuttings moist until planting.
· Pointed planting bars or
crowbars to make the holes for planting.
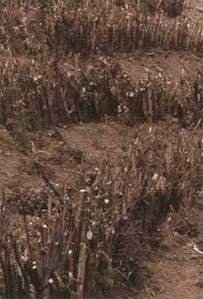
A completed palisade
A simali palisade excavated after
one growing season to show the development of roots
Spacing
Spacing between palisades depends on the steepness of the slope.
The following spaces should be used.
|
Slope less than 30° |
2 m interval; |
|
Slope 30 to 60° |
1 m intervals. |
Within the palisade lines, cuttings should be at centres of
between 30 and 50 mm. A wider gap than this is acceptable on gentle slopes, but
on steep slopes this spacing is required to give adequate protection.
SPECIES SUITABLE FOR PALISADES
|
Local name |
Botanical name |
Altitude range |
Sites summary |
|
Assuro |
Adhatoda vasica |
Terai - 1000 m |
Varied |
|
Bainsh |
Salix tetrasperma |
Terai - 2700 m |
Moist |
|
Dabdabe |
Garuga pinnata |
Terai - 1300 m |
Varied and dry; |
|
Kanda phul |
Lantana camara |
Terai - 1750 m |
Hot and dry |
|
Namdi phul |
Colquhounia coccinea |
1000 - 2000 m |
Varied |
|
Phaledo |
Erythrina species |
900 - 3000 m |
Varied |
|
Saruwa bihaya |
Ipomoea fistulosa |
Terai - 1500 m |
Varied; hot or wet |
|
Simali |
Vitex negundo |
Terai - 1750 m |
Hot and dry, varied |
Construction steps
1 Trim and clean the site well in advance of the
planting operation. Remove irregularities and loose debris.
2 With string, mark out the lines to be planted.
3 Always start at the top of the slope and work downwards.
4 Using a pointed bar, make a hole in the slope that is bigger
than the cutting and deep enough to take at least two-thirds of its length.
5 Carefully place the cutting in the hole, so that at least
two-thirds is buried. Firm the soil around it, taking care not to damage the
bark. Ideally, only one node of the cutting or about the top 100 mm should
protrude from the soil. On steep, unstable sites, however, a greater protrusion
helps to raise the delicate new shoots above the zone of moving debris, and to
catch more debris.
Good site supervision is essential to ensure that lines run
along the contours and do not concentrate runoff; also to make sure that
cuttings are not allowed to dry in the sun. Cuttings buried completely have a
higher success rate than those planted with the tops partially exposed. Under
extreme conditions, cuttings can be hammered into the slope. However, this is
likely to cause physical damage and reduce the chances of success.
Maintenance
Since the spacing of plants recommended here is very dense,
there is unlikely to be a need for replacing failures, but some thinning of the
trees or shrubs may be required after a few years. The main maintenance checks
should be as follows.
Protection (check on Kartik 1);
Weeding (check on
Shrawan 1, Bhadra 1 and Aswin 1);
Thinning (check on Kartik 1, starting three
years after site works).
Main functions
Palisades armour and reinforce the slope, catch debris and, if
angled, provide drainage. They form a strong and low-cost barrier built with the
minimum disturbance to the slope.
Main limitations
Palisades are not as strong as brush
layering.
3.12 Live check dams
Function
Large woody (or hardwood) cuttings are planted across a
gully, usually following the contour. These form a strong barrier and trap
material moving downwards. In the longer term, a small step will develop in the
floor of the gully. The main engineering functions are to catch debris, and to
armour and reinforce the gully floor.
Sites
This technique can be used on a wide range of gully sites, on
slopes of up to 45º. However, materials subject to high rates of small
scale slumping should be avoided.
Materials
· Large cuttings (2
metres long and 20 to 50 mm in diameter) made from woody material that is 6 to
30 months old. Cut the tops at right angles to the stem and the bottom at
45°; it is then clear as to which way it should be inserted. If possible,
take the cuttings on the same day that they are to be planted.
· Truncheon cuttings 2 metres
long and 30 to 80 mm in diameter, preferably of simali, dabdabe or phaledo.
· Hessian and water to keep the
cuttings moist until planting.
· Pointed planting bars or
crowbars to make the holes for planting.
Spacing
Spacing between check dams depends on the steepness of the gully
slope and the profile of the gully floor. Live check dams should normally be at
intervals of between 3 and 5 metres. Within the check dams, cuttings should be
about 30 to 50 mm apart. A wider gap than this is acceptable on gentle slopes,
but on steep slopes this spacing is required to give adequate protection. If a
double, offset line is planted, it will give a much stronger check dam.

Backfill around the check dam and
compact the soil with foot pressure
Live check dams form a strong
barrier on a wide range of gully sites, on slopes up to 45°
Construction steps
1 Choose a location for the live check dam so that
the maximum effect can be achieved in terms of gully stabilisation.
2 Make a hole deep and big enough to insert vertical
hardwood cuttings of the largest size available (truncheon cuttings up to 2
metres in length of species such as dabdabe and phaledo are best). Use a
crowbar if necessary to extend the hole.
3 Insert the vertical cuttings by carefully pushing them into
the hole and firming the soil around them. Try not to damage the bark. They
should protrude about 300 mm above the ground surface.
4 Place fascines or long hardwood cuttings on the uphill side of
the vertical stakes.
5 Key these horizontal members into the wall of the gully.
6 Backfill around the check dam and compact the soil with
foot pressure.
Maintenance
Since the spacing of plants recommended here is very dense,
there is unlikely to be a need for replacing failures, but some thinning of the
trees or shrubs may be required after a few years. The main maintenance checks
should be as follows.
Protection (check on Kartik 1);
Weeding (check on
Shrawan 1, Bhadra 1 and Aswin 1);
Thinning (check on Kartik 1, starting three
years after site works).
SPECIES SUITABLE FOR LIVE CHECK DAMS
|
Local name |
Botanical name |
Altitude range |
Sites summary |
|
Horizontal cuttings |
|
|
|
Assuro |
Adhatoda vasica |
Terai - 1000 m |
Varied |
|
Bainsh |
Salix tetrasperma |
Terai - 2700 m |
Moist |
|
Kanda phul |
Lantana camara |
Terai - 1750 m |
Hot and dry |
|
Namdi phul |
Colquhounia coccinea |
1000 - 2000 m |
Varied |
|
Saruwa bihaya |
Ipomoea fistulosa |
Terai - 1500 m |
Varied; hot or wet |
|
Simali |
Vitex negundo |
Terai - 1750 m |
Hot and dry; varied |
|
Main vertical support member cuttings |
|
|
|
Dabdabe |
Garuga pinnata |
Terai - 1300 m |
Varied and dry |
|
Phaledo |
Erythrina species |
900 - 3000 m |
Varied |
The cuttings to provide vertical support should be
of the biggest and strongest materials, In the form of truncheon cuttings (2
metres long and 30 to 80 mm in diameter). Dabdabe and phaledo are excellent for
this. Other possible species are chuletro (Brassaiopsis hainla), kavro
(Ficus lacor) and gliricidia (Gliricidia
sepium).
Components of a live check
dam
Main functions
Live check dams catch debris and to a lesser extent, also armour
and reinforce gully floors. They are an effective low-cost structure in smaller
gullies, or can be used in between masonry check dams. Their flexibility and the
relative lack of site disturbance during construction make them very suitable
for use on weak materials, where civil engineering can easily be scoured around.
Main limitations
Large and very active gullies require stronger measures than can
be provided by vegetation
alone.
3.13 Fascines
Function
The word 'fascine' means a bundle of sticks. In this technique,
bundles of live branches are laid in shallow trenches. After burial in the
trenches, they put out roots and shoots, forming a strong line of vegetation. It
is sometimes called live contour wattling. The main engineering functions are to
catch debris, and to armour and reinforce the slope. In certain locations,
fascines can be angled to provide drainage. Where time is at a premium, brush
layers may be more appropriate as these are quicker to establish than fascines
(see Section 3.10, Brush layering).
SPECIES SUITABLE FOR FASCINES
|
Local name |
Botanical name |
Altitude range |
Sites summary |
|
Assuro |
Adhatoda vasica |
Terai - 1000 m |
Varied |
|
Bainsh |
Salix tetrasperma |
Terai - 2700 m |
Moist |
|
Dabdabe |
Garuga pinnata |
Terai - 1300 m |
Varied and dry |
|
Kanda phul |
Lantana camara |
Terai - 1750 m |
Hot and dry |
|
Namdi phul |
Colquhounia coccinea |
1000 - 2000 m |
Varied |
|
Phaledo |
Erythrina species |
900 - 3000 m |
Varied |
|
Saruwa/ bihaya |
Ipomoea fistulosa |
Terai - 1500 m |
Varied; hot or wet |
|
Simali |
Vitex negundo |
Terai - 1750 m |
Hot and dry; varied |

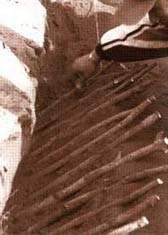
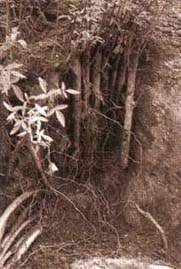
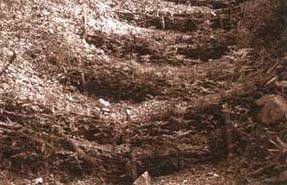
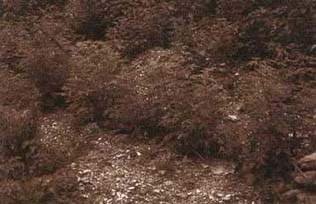
Fascines are effective on
consolidated debris. They put out roots and shoots which develop into a strong
line of vegetation, catching falling debris as well as armouring and reinforcing
the slope
Fascines are effective on
consolidated debris. They put out roots and shoots which develop into a strong
line of vegetation, catching falling debris as well as armouring and reinforcing
the slope
Sites
Fascines are best used on consolidated debris or soft cut
slopes. If the material is too hard, growth will be unacceptably slow. The
maximum slope is about 45°. On well-drained materials, contour fascines are
used; on poorly drained materials, a herringbone pattern (¬¬¬¬¬) of fascines is used to improve drainage.
Materials
· Woody cuttings of
suitable species, at least one metre long and 20 to 40 mm diameter;
· Hessian and water to keep the cuttings moist until
planting;
· Tools to dig trenches;
· (Optional) Jute or coir string or wire to bind
the fascine as it is laid.
Spacing
Spacing between fascines depends on the steepness of the slope.
|
Less than 30° |
4 m interval; |
|
30 to 45° |
2 m interval. |
Within the fascines, there should be at least four but no more
than eight cuttings.
Construction steps
1 Prepare the site well in advance of planting.
Clear all loose material and protrusions and firmly infill depressions.
2 Mark on the slope the lines where fascines are to be
installed. Supervise workers carefully to ensure that the lines follow the
contour or desired angle precisely.
3 Always construct fascines from the bottom of the slope, and
work upwards.
4 Dig about five metres of trench at a time, carrying out Step 5
at the same time. This ensures that the soil in the trench is exposed only for a
short period, thereby minimising the loss of residual soil moisture. The trench
should be about 100 mm deep and 200 mm wide.
5 Lay the cuttings together, filling the trench and with their
ends overlapping so that they form a single cable right across the slope. Four
cuttings per bundle is normal, but use eight per bundle if there is a lot of
material available or if the site is very critical.
6 The fascines can be bound as they are installed by first
laying strings across the trench and then tying it when the cuttings are in
place. This helps to keep the cuttings together during backfilling but is not
essential.
7 Backfill the trench as soon as possible, lightly covering the
cuttings, and tamp the soil down firmly around it.
8 If the slope angle is more than 25°, you should peg the
fascine. This can be done by placing a large cutting at right angles into the
slope immediately below the fascine. Use one peg per 500-mm run of
fascines.
Maintenance
Since the spacing of plants resulting from fascines is very
dense, there is unlikely to be a need for replacing failures, but some thinning
of the shrubs may be required after a few years. The main maintenance checks
should be as follows.
Protection (check on Kartik 1);
Weeding (check on
Shrawan 1, Bhadra 1 and Aswin 1);
Thinning (check on Kartik 1, starting three
years after site works).
Main functions
Fascines armour and reinforce the slope, catch debris and, if
angled, provide drainage. They form a very strong and low-cost barrier, useful
on a variety of sites.
Main limitations
Fascines do not form a physical barrier immediately as do brush
layers, but require a period of growth to become effective. Construction causes
disturbance to the
slope.
3.14 Vegetated stone pitching
Function
Slopes are strengthened by a combination of dry stone walling or
cobbling, and vegetation planted in the gaps between the stones. There are two
distinct uses: (1) reinforced toe walls; and (2) protected gully beds. This
technique provides a very strong form of armouring. Because it specifically uses
vegetation to strengthen a simple civil engineering technique, it represents a
stronger form of normal stone pitching (see Section 2.6).
Sites
Steep, low slope toe walls of up to 2 metres in height, and
gully floors with a maximum slope of 45°.
Vegetated stone-pitched toe walls
These provide strong armouring at the base of a slope and
prevent undermining. Where major support is needed, gabion or masonry toe walls
may be required. Dry stone toe walls can only be used in limited applications.
Walls using this technique should not be more than 2 metres high and should be
laid back at an angle of about 60°.
Cobbling with vegetation planted
between the stones provides strong armouring
Cobbling with vegetation planted
between the stones provides strong armouring
Vegetated stone-pitched gully floors
Gully beds are cobbled to prevent downcutting, and then plants
are established between the cobbles to stop them being pulled out by running
water.
Materials
· Stones for
construction.
· Hardwood cuttings or seeds of
suitable shrubs (but not of large trees) for walls.
· Grass slips for gully floors.
Spacing
Plants should be established at 250 mm centres initially, on a
random pattern.
Construction steps
Walls
1 Construct the wall normally, but make sure that
there is plenty of soil in the backfill mixture;
2 once the wall is ready,
wait until the monsoon rains are imminent. Then place the cuttings or seeds
carefully between the stones, taking care not to damage the bark or seed
coat.
Gullies
1 Clean the gully floor completely of all debris and
excavate as necessary until a firm base is exposed;
2 lay the stones carefully together, always keeping the flattest
sides on the surface. Reduce gaps to a minimum and pack all voids with soil. The
stone pitching should have a U-shaped cross-section to prevent scour at the
sides;
3 once the monsoon rains have started, plant grass slips between
the stones. Ideally, smaller grasses should be planted in the main channel, with
larger grasses along the sides.
Maintenance
Since the spacing of plants in vegetated stone pitching is very
dense, there is unlikely to be a need for replacing failures, but some thinning
of shrubs may be required after a few years. The main maintenance checks should
be as follows.
Protection (check on Kartik 1);
Weeding in the
first few years (check on Shrawan 1, Bhadra 1 and Aswin 1);
Thinning (check
on Kartik 1, starting three years after site works).
Main functions
Vegetated stone pitching provides a very strong form of
armouring. This is particularly useful for gully floors carrying large flood
discharges.
Main limitations
The main limitation is that over a large area it becomes costly;
although relative to many toe walls or other forms of gully control, this may
not in fact be
limiting.
3.15 Jute netting (standard mesh)
Function
A locally made geotextile of woven jute netting is placed on the
slope. Standard mesh jute netting (mesh size about 40 × 40 mm) has four
main functions:
· Protection of the
surface, armouring against erosion and catching small debris;
· Allowing seeds to hold and
germinate;
· Improvement of the
microclimate on the slope surface by holding moisture and increasing
infiltration;
· As it decays, it acts as a
mulch for the vegetation established.
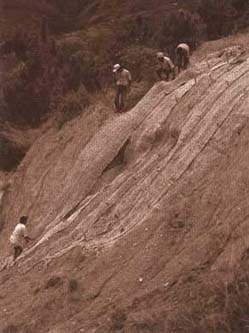
Jute netting is a temporary
measure, designed to enhance the establishment of vegetation
Ensure that the jute netting is
loose enough to be held against the surface over the whole slope.
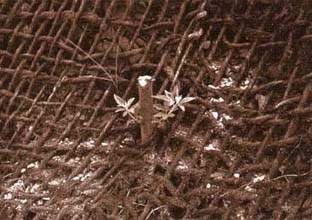
Live pegs will grow to add more
strength to the slope
Any use of jute netting is a temporary measure designed to
enhance vegetation establishment. It does not protect a surface in itself for
more than one or two seasons of monsoon rains.
Sites
Standard netting is used on steep, hard slopes where the
existing conditions are too harsh for vegetation to establish itself without
assistance. Slope angles of 45 to 60° are normal. It is best on
well-drained materials that are too hard for vegetation to grow in unaided, or
on slopes exposed to hot sun and where extreme drought would otherwise be a
problem. It should not be used on soft or poorly drained materials. It should
never be used on materials with a high rate of shallow slumping. Drainage is so
important in sites treated with jute netting that slopes less than 45°
should not normally be covered. This excludes all debris materials.
Materials
· Woven jute
netting.
· Hardwood cuttings from shrubs
or trees, 20 to 50 mm in diameter and 300 to 400 mm long, or other pegs, such as
split bamboos.
· Tools for cutting wood and
jute; an iron bar for making holes, and a wooden mallet.
Standard jute netting rolls are normally 10.0 to 11.5 metres
long by 1.0 to 1.2 metres wide. The yarn is of 5 to 8 mm diameter. Across the
net there should be an average of 27 warp ends (length-ways threads) per
metre; along the length of the net, there should be 20 to 24 weft strands
(cross threads) per metre. The average mesh size should be 40 mm square holes.
The weight should be 1.0 to 1.2 kg per square metre. These specifications are
higher than those used in the Indian road sector (where 0.5 and 0.75 kg/sq. m
are recommended). Experience has shown that the heavier grade material hangs
better on the slope, catches more material, retains more moisture and remains
effective for longer.
The life of jute netting can be extended by soaking in a bath of
bitumen diluted with kerosene. However, this has the effect of reducing the
water retention capacity of the material, which is a desirable attribute on many
sites.
Spacing
Completely cover the affected area with netting, anchoring pegs
spaced at 500 to 1000 mm centres.
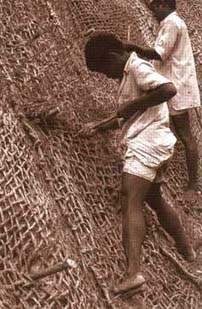
Construction steps (standard netting)
1 Trim the site to an even slope, ensuring that
there are no small protrusions or depressions that will interfere with the
netting.
2 Starting at one end of site, peg the end of one roll of
netting 300 mm above the slope to be covered.
3 Slowly unroll the netting down the slope.
4 Allowing some slack in the netting, begin to peg it from the
bottom of the slope. Hammer hardwood cuttings or pegs through it at intervals of
500 to 1000 mm, leaving the cuttings protruding about 80 mm.
5 Repeat the process, making sure that the vertical edges of the
net meet, until the whole slope is covered in netting.
6 Place a series of pegs down each side of the net so that there
is no gap between the strips.
7 Adjust the netting in order to reduce the tension and let it
hug the surface closely. If it remains tight it will not lie right against the
slope surface.
8 Add further pegs as necessary to ensure complete contact with
the surface.
9 Trim the netting strips to the length required.
10 As soon as the monsoon rains permit, plant grass slips
randomly through the netting over the entire area (see Section
3.4).
Integration with bio-engineering
Standard mesh jute netting should only be used in conjunction
with bio-engineering techniques as follows:
· Through the
netting: plant grass slips in a random pattern, at an average spacing of about
100 mm centres, according to site characteristics and as determined by the
instructions in Section 3.4.
· If a deeper reinforcing is
required, the surface can be seeded with shrubs or small trees (direct seeding
is best, but broadcasting is also possible), using species appropriate to the
site and following the techniques described in Section 3.8.
It is important to ensure that the netted area becomes protected
with vegetation during the first two planting seasons, because it has to take
over the role of surface protection from the jute in that time.
Maintenance
The jute netting itself is not normally maintained, but simply
allowed to rot away. Maintenance is carried out only for the bio-engineering
measures.
Main advantages
A very effective aid to the establishment of a permanent grass
cover on hard, dry materials on steep cut slopes.
Main limitations
Since jute netting forms a mulch, it raises the moisture
content of the soil: if the material has poor internal drainage, this can lead
to liquefaction following intense
rainfall.
3.16 Jute netting (wide mesh)
Function
A locally made geotextile of woven jute netting is placed on the
slope. Wide mesh jute netting (mesh size about 150 × 450 mm) is used to
hold mulch on slopes that have been seeded.
Any use of jute netting is a temporary measure designed to
enhance vegetation establishment. It does not protect a surface in itself.
Sites
Wide-mesh netting is normally used on any site where plant seeds
have been covered in mulch, where the slope angle is between 30° and
45º. Sites less than 30° do not normally need netting to hold the
mulch in place.
Materials
· Woven jute
netting.
· Hardwood cuttings from shrubs
or trees, 20 to 50 mm in diameter and 300 to 400 mm long, or other pegs.
· Tools for cutting wood and
jute; an iron bar for making holes, and a wooden mallet.
Rolls of wide-mesh jute netting are usually 10.0 to 11.5 metres
long by 1.0 to 1.5 metres wide. The yarn is of 3 to 5 mm diameter. Across the
net there should be an average of seven warp ends (length-ways threads) per
metre; along the length of the net, there should be an average of three weft
strands (cross threads) per metre. The average mesh size should be 150 ×
450 mm rectangular holes. The weight should be 0.2 kg ±10% per square
metre.
Spacing
Mulch (placed over seeds) is covered with netting. Anchoring
pegs are normally placed at 500-mm centres.
Construction steps (wide mesh netting)
1 Place the netting only on to sites which have been
seeded and covered in mulch: for details of these, refer to grass seeding
(Section 3.5) and mulching (Section 3.17).
2 Open the net to its full length and place it carefully on the
slope.
3 Allowing some slack in the netting, begin to peg it from the
bottom of the slope. Hammer hardwood cuttings or pegs through it at intervals of
500 mm, leaving the cuttings protruding about 80 mm.
4 Repeat the process, making sure that the vertical edges of the
net meet, until the whole slope is covered in netting.
5 Place a series of pegs down each side of the join between
strips and bind the strips of net together, so that the jute is held together as
a continuous net.
6 Adjust the netting to ensure that it holds the mulch firmly on
to the slope surface throughout the site.
7 Add further pegs as necessary to ensure complete contact with
the surface.
8 Trim the netting strips to the length required.
Integration with bio-engineering
Wide mesh jute netting should only be used in conjunction with
bio-engineering techniques as follows:
· Before the netting
is applied, the slope is seeded with grass (see Section 3.5) and covered in
mulch (see Section 3.17).
· If a deeper reinforcing is
required, the surface can be seeded with shrubs or small trees (direct seeding
is best, but broadcasting is also possible if done before the mulch is applied),
using species appropriate to the site and following the techniques described in
Section 3.8.
Maintenance
The jute netting itself is not normally maintained, but simply
allowed to rot away. Maintenance is therefore that of the vegetation, and the
relevant part of Section 5 should be consulted for details.
Main advantages
A useful way of ensuring that mulch stays in position on a
slope, while the seeds underneath germinate and establish a complete vegetation
cover.
Main limitations
Like the mulch underneath, the jute netting is only a very
temporary aid to vegetation establishment. Mulch cannot normally be held on
slopes steeper than 45°.
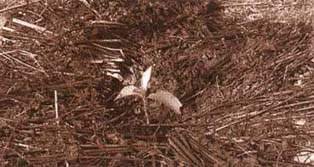
Mulching helps to keep the soil
cool and moist close to young
seedlings
3.17 Mulching
Function
Mulch is used only as a temporary measure to aid the
establishment or growth of vegetation. Alone it will not protect a slope or
establish a vegetation cover. There are two main ways of applying mulch: either
it is placed around individual plants or it is applied over a whole slope.
In the first, it is to help keep the soil cool and moist, to
enhance the growth and early establishment of shrub and tree seedlings, and
particularly of large bamboos.
Where mulch is to treat the entire site, chopped plant material
or brushwood is laid across the slope to form a surface cover. This is an
extremely temporary measure useful only to help other plants establish. It is
normally used to aid the establishment of grass seed, and therefore is a
temporary form of surface armouring.
Sites
Any site suitable for grass seeding. This is almost any bare
site with slopes up to 45°; mostly on well-drained materials, where
increased infiltration does not give rise to problems. Also anywhere that large
bamboos, or shrub or tree seedlings, have been planted.
Materials
· Cut stems and
leaves of any plants. It is important not to use plant parts carrying seeds, as
this will lead to a big weeding problem. Annual herbs such as ban mara
(Eupatorium adenophorum) and tite pate (Artemisia vulgaris) are
best if they are allowed to wilt before use. This is the only use of these plant
species in bio-engineering.
· On slopes greater than
30°, wide mesh jute netting (150 mm × 500 mm mesh size) is needed to
hold mulch on to the surface (see Section 3.16).
Spacing
A complete cover of mulch to the depth described in the
construction steps.
Construction steps
1 Collected material should be chopped to a maximum
size of 150 mm. It can be stored until required if necessary.
2 When mulching grass seeded areas, the mulch is evenly spread
over the surface to give a cover of 50-mm thickness.
3 When mulching individual seedlings, the mulch is spread around
the plant being treated in a layer between 50 and 100 mm thick. A circle of
radius 150 mm should be left by the plant itself. Outside this, the mulch should
form a circle of about 750 mm radius.
Integration with bio-engineering
Bio-engineering techniques should be used in connection with
mulching as follows.
· Large areas:
before the mulch is applied, the slope is seeded with grass (see Section 3.5);
if the slope is greater than 30°, then the mulch should in turn be covered
by wide mesh jute netting (see Section 3.16).
· Where large bamboos have been
planted, mulch is always applied around the new plant during the first two
years.
· If the mulch is being used
around other existing plants, then it is normally applied to aid the growth of
planted shrubs or trees by keeping the soil cooler and more moist at the hot,
dry time of the year.
Maintenance
This is a temporary technique, requiring no maintenance. Future
maintenance is for the bio-engineering technique for which the mulch is an aid.
Main advantages
A cheap aid to the establishment of different kinds of
vegetation, particularly important on hot and dry slopes, and where lack of soil
moisture can limit growth.
Main limitations
Mulch is only very temporary in nature. Freshly cut ban mara and
tite pate used in the monsoon may root and start to grow. It must be allowed to
wilt in the sun before being applied to the site. Mulch carrying seeds can cause
a massive problem from
weeds.
3.18 Vegetated gabions
Function
Gabion walls are strengthened by trees growing on them. There
are two distinct types: (1) normal stone gabions; and (2) earth-filled gabions.
This technique provides a form of slope support.
Sites
Any slope where gabion walls are suitable for slope retention.
Stone gabions require damp sites for trees to establish on them.
Vegetated stone gabions
These tend to come about naturally where trees have seeded
existing gabion walls, although they could be seeded artificially. There is no
distortion of the gabion boxes. The benefit is that the trees will provide
flexible binding to the structure once the wire has corroded.
Vegetated earth-filled gabions
These have been tried in some locations as a lower-cost
alternative to stone gabions. A fill of in situ earth is placed behind a
single layer of dry stone within the gabion basket (the stone layer prevents the
washing out of the earth fill). Tree seedlings are planted on the gabion.
Materials
· Stones, wire and
tools for gabion construction. In earth-filled gabions, the material from the
excavation is used as a fill.
· For stone gabions, seeds of
suitable trees: utis (Alnus nepalensis) and dar (Boehmeria rugulosa)
colonise existing walls most often. Alternatively, if holes can be made
right through the gabion wall, long hardwood cuttings can be used of species
such as dabdabe (Garuga pinnata) or phaledo (Erythrina species).
· For earth-filled gabions,
polypot seedlings of tree species appropriate to the site.
Spacing
Plants should be established at 500 mm centres initially, on a
random pattern.
Construction steps
1 Construct the gabion normally, depending on the
fill type.
2 For stone gabions, sow the seeds directly into the gaps
between the stones. A rate of 25 seeds per cu. m of gabions allows for the high
rate of failure, which should be expected.
3 If hardwood cuttings are to be used, a hole must be made right
through the gabion into the original ground below. This is normally practical
only for gabion mattresses or revetments of 1-metre thickness.
4 For earth-filled gabions, plant four polypot tree seedlings
per cu. m of gabion at an equal spacing in the top panel of each
box.
Maintenance
Since the spacing of plants in vegetated gabions is very dense,
there is unlikely to be a need for replacing failures, but some thinning of
trees may be required after a few years. The main maintenance checks should be
as follows:
Protection (check on Kartik 1);
Weeding in the
first few years (check on Shrawan 1, Bhadra 1 and Aswin 1);
Thinning (check
on Kartik 1, starting three years after site works).
Main functions
Vegetated gabions may offer a lower cost option for supporting
certain slope types.
Main limitations
For stone-filled gabions, trees are unlikely to contribute much
to the strength of the structure until the wire has corroded seriously. The
stability of a gabion wall with serious corrosion problems, with or without
trees, is not well researched in Nepal, and remains uncertain at present.
Numerous observations demonstrate that tree roots do not distort gabion
structures, as is sometimes claimed.
The use of vegetated earth-filled gabions may well have great
potential in Nepal. Experiments have been limited in scope and the results have
consequently not been conclusive. At the time of writing this manual, the
Geo-Environmental Unit of the Department of Roads had not recommended them for
use on the strategic road network; but nor had it ruled them out as a future
possibility.
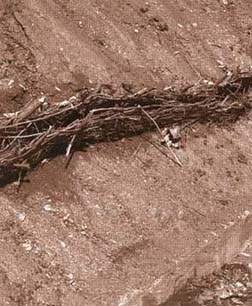
Live wattle fences can be
effective at catching falling debris on gentle
slopes
3.19 Live wattle fences
Function
Fences made out of live cuttings are placed across the slope.
Debris moving down the slope is trapped behind them. This is a relatively poor
technique used to catch material on gentle slopes.
Sites
Slopes up to a maximum of 30°.
Materials
The following will be required:
· Hardwood cuttings,
as for fascines, at least 1 metre long and 20 to 40 mm in diameter.
· Hessian and water to keep the cuttings
moist.
· Tools for digging grooves in the
slope.
Spacing
Wattle fences should be placed about every 4 to 5 metres down
the slope.
Construction steps
1 Prepare the site well in advance of planting. All
loose material and protrusions should be cleared away, and depressions firmly
infilled.
2 Mark on the slope the lines where wattle fences are to be
installed. Careful supervision will be required to ensure that the lines follow
the contour precisely.
3 Place pegs at intervals of about 250 mm along the lines: this
is done by placing large cuttings into the ground. Pegs should protrude about
300 mm.
4 Dig out a groove along the contour between the pegs: it should
be at least 100 mm deep.
5 Place the cuttings with their lower ends in the groove,
bending them down along the line of the fence. Weave them in and out between the
pegs. Firm the soil back into the groove.
6 The end result should have the cuttings almost horizontally
above each other, but with the ends firmly planted in the soil.
Maintenance
Because the spacing of plants in wattle fences is very dense,
there is unlikely to be a need for replacing failures, but some thinning of
shrubs may be required after a few years. The main maintenance checks should be
as follows:
Protection (check on Kartik 1);
Weeding in the
first few years (check on Shrawan 1, Bhadra 1 and Aswin 1);
Thinning (check
on Kartik 1, starting three years after site works).
Main functions
Live wattle fences catch debris moving down the slope, and have
limited functions of armouring and reinforcement.
Main limitations
Often the structure is too weak to support the volume of debris
that is caught. They have not been found to be as effective as techniques such
as brush layering and fascines; or, on more critical slopes, as reliable as wire
bolster
cylinders.
3.20 Hydro-seeding
Function
'Hydro-seeding' covers a range of possible options, which use
high pressure pumps to spray a mixture of seed and mulch, and sometimes other
materials, directly on to a slope. These techniques provide a random cover of
vegetation and do not have the structural benefits of manual bio-engineering
systems. The main functions are to armour and reinforce the slope.
Sites
Hydro-seeding is reputed to be capable of use on almost any
site. However, pumps and their hoses tend to limit reach to a maximum of 100
metres or less from the nearest road point. This technique should not be used on
poorly drained materials, where there is any risk of slumping or shallow mass
movement.
Experience in Nepal
At the time of writing this handbook, there had never been any
widespread use of hydro-seeding in Nepal. The Department of Roads, through
several donor-assisted projects, had conducted experiments on a number of
different technical systems. There appears to be scope for these techniques on
well-funded road construction projects, but a number of limitations affect its
routine use in maintenance activities. These limitations are chiefly as follows:
(1) high cost, complex machinery is required to spray the mixtures; (2) a large
number of inputs (such as seed, mulch, and fertiliser) are required; (3) a
number of special skills are required for the team implementing the work; (4)
the unit cost is extremely high for small areas, but diminishes with increased
scale.

Manual methods of bio-engineering
are cheaper and easier to implement than mechanical techniques such as
hydro-seeding
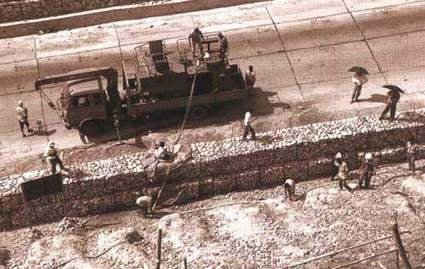
Manual methods of bio-engineering
are cheaper and easier to implement than mechanical techniques such as
hydro-seeding
For routine works, the experience of the Department of Roads,
and of most projects, is that the manual methods of bio-engineering described in
this handbook are cheaper and more straightforward to implement. They also allow
very precise treatment of slope surfaces.
Materials
· High pressure
solids pump, with mixing tanks, agitators, hoses and spray nozzles.
· A lorry with a mounted crane
to carry the pump, tanks and other equipment.
· A water tanker.
· For steep slopes greater than
15 metres above or below the road, scaffolding is required.
· A mix (between 1 and 30 litres
per sq. m) of seeds (usually grasses and shrubs), fertiliser, mulch, soil
improver, binding agent and water. Some methods also add a mixture of forest
topsoil and clay loam to improve surface rooting conditions, bringing the mix to
about 100 litres per sq. m (i.e. 0.1 cu. m/sq. m).
Construction steps
1 Prepare the site well in advance of planting.
Remove all debris and either remove or fill in surface irregularities so that
there is nowhere for erosion to start. If the site is on backfill material, it
should be thoroughly compacted, preferably when wet.
2 Collect together the various materials needed for the
operation. It is normal to have a training session with the hydro-seeding team
in a suitable off-site location.
3 Mix the ingredients together in the tank and spray them on to
the site immediately. Delays cannot be allowed because of the need to keep all
parts of the mixture agitated in suspension, and because the binding agent will
start to act.
4 The thickness of the surface cover depends on the technique
being used and the nature of the sprayed mixture. A minimum of 5 to 20 mm is
normal. Techniques adding a soil base are usually 50 to 100 mm thick, often
requiring two sprayings.
Maintenance
Since the spacing of plants resulting from hydro-seeding is very
dense, there is unlikely to be a need for replacing failures, but some thinning
of the shrubs may be required after a few years. The main maintenance checks
should be as follows:
Protection (check on Kartik 1);
Weeding (check on
Shrawan 1, Bhadra 1 and Aswin 1);
Thinning (check on Kartik 1, starting three
years after site works).
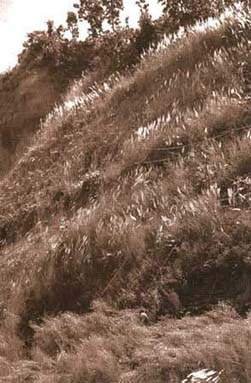
Hydro-seeding can yield
spectacular results for surface covering, but this example was estimated to cost
about thirty times more than the manual method
Main functions
Hydro-seeding is used in many countries to armour and reinforce
slopes. The vegetation also has a limited catching effect. In appearance, the
overall results often appear spectacular.
Main limitations
Hydro-seeding has none of the structural advantages of the
planted grass lines, or techniques such as brush layering and
fascines. It lacks the detailed treatment of site conditions offered by
all the manually applied techniques. However, the greatest limitations lie in
the relatively high cost, and its reliance on a wide range of complex inputs, of
which the high-pressure pump is only
one.
