3. Testing Tools
Testing tools (gauges) are sensitive instruments of surface
hardened steel without any graduation. The measure is represented by their shape
or size or setting.
Some testing tools have their type of measure engraved on them.
3.1. Size gauges
Size gauges are used to determine sizes or to check whether any
dimensions of parts are within admissible limits.
The answer may be:
Yes - the size is within the admissible range.
No
- the size is smaller than required.
No - the size is bigger than
required.
If the answer is "no", it is to be decided whether (reworking)
corrections of the part are possible.
Caliper:
Instrument with movable legs for outside and inside testing
which are set to the size of the workpiece or setting of which is done by means
of a measuring instrument before use.
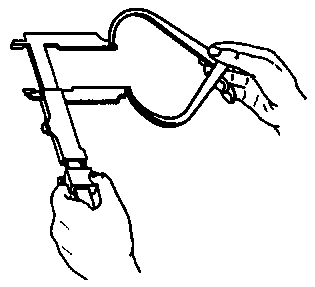
Figure 11 Outside calipering
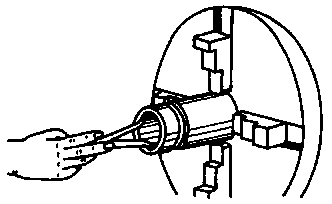
Figure 12 Inside calipering
Thickness gauge:
Instrument which consists of several leaves of different
thicknesses (0.05 to 0.1 mm increments) and is used to determine the size of
narrow clearances by inserting a leaf into the clearance.
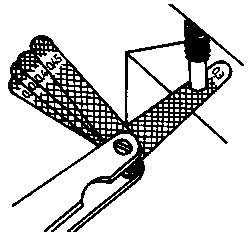
Figure 13 Clearance testing by means
of a thickness gauge
Drill and wire gauges:
Instruments with holes on a steel disk in 0.1 mm increments to
quickly determine the diameter of drills or wires.
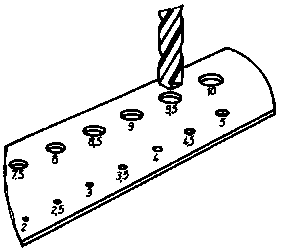
Figure 14 Testing of diameters by
means of the drill and wire gauge
Block gauges:
Square, standardized blocks, each representing a very precise
measure of length (from 0.1 mm) .They are arranged in sets in boxes and are used
for differential or comparative measurements.
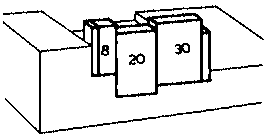
Figure 15 Testing by means of block
gauges
Limit gauges:
Instruments representing the maximum and minimum limits of very
small, standardized tolerance ranges (such as to the ISA system of tolerances
and fits):
- Cylindrical limit plug gauge - for fitting inside diameters

Figure 16 Cylindrical limit plug
gauge
1 "go" end (minimum size), 2 handle with designation of fit, 3
marking (red) of "not go" end, 4 "not go" end (maximum size)
- Limit screw plug gauge - for fitting female threads.

Figure 17 Limit screw plug gauge
Testing method:
The "go" end (minimum diameter) must easily go into the bore,
the "not go" end (maximum diameter, marked with red colour) must not go into the
bore.
- Limit snap gauge - for fitting outside diameters
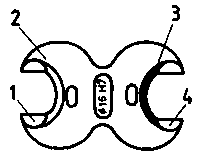
Figure 18 Limit snap gauge
1 "go" end (maximum size), 2 gauge body with designation of fit,
3 marking (red) of "not go" end, 4 "not go" end (minimum size)
Testing method:
The "go" end (maximum diameter) must easily go over the
work-piece, the "not go" end (minimum diameter, marked with red colour) must not
slide over the workpiece,
- Ring thread gauge - for fitting male threads
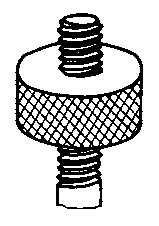
Figure 19 Ring thread gauge
Testing method:
When the ring can be screwed onto the thread, the thread is
fitting!
(This does, however, not say whether the thread is possibly skew
or dented).
What is the difference between measuring and testing tools?
__________________________________________________
What are the special features of limit gauges compared to simple
size gauges?
__________________________________________________
What testing method is typical of the use of cylindrical limit
plug gauges?
__________________________________________________
What are the results of testing by means of limit screw plug
gauges and ring thread gauges?
__________________________________________________
3.2. Form gauges
Form gauges are used to determine whether the requirements as to
flatness, squareness, roundness or other forms are met.
The light-gap testing method is applied:
Place the gauge against the workpiece and hold it against the
light! The light gap between the gauge and workpiece must be evenly narrow!
(Form errors from 0.003 mm can be detected)
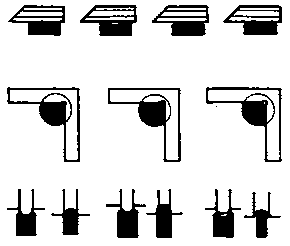
Figure 20 Light-gap testing
Levelling straightedge:
Instrument designed as steel straightedge (with straight
reference faces) or as bevelled steel straightedge (with one knife edge) for
flatness tests on finished surfaces.
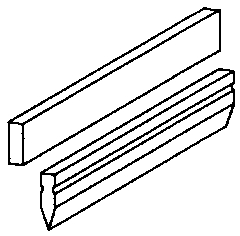
Figure 21 Levelling straightedges
Try square:
Instrument designed as millwrights' steel square (with straight
reference faces), back square (with straight reference faces and one reference
face designed as stock support) or bevelled edge square (with one knife edge)
for flatness tests of faces and angularity tests (mostly 90° degrees) of
two faces or edges to each other.
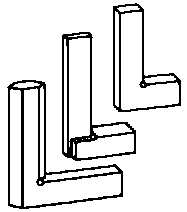
Figure 22 Try squares
Angle gauges:
Instruments for specific angles (60, 120, 55. 118 degrees).
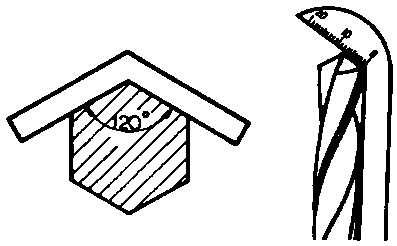
Figure 23 Angle gauges
Radius gauges:
Instruments consisting of one or more specifically radiused
leaves (increment of radii 1 mm) for convex or concave radii.
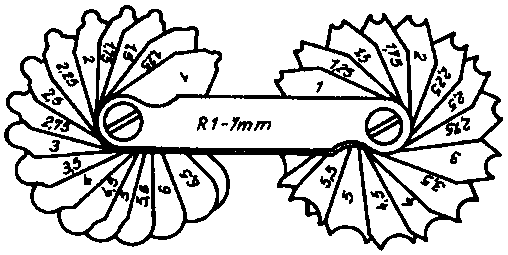
Figure 24 Radius gauge
Which testing method is typical of form gauges?
__________________________________________________
What is the difference between try squares and angle gauges?
__________________________________________________


