Back to Home
Page of CD3WD Project or Back to list of CD3WD Publications
 |  |  | PHAST Step-by-Step Guide: A Participatory Approach for the Control of Diarrhoeal Disease (PHAST - SIDA - UNDP - WB - WHO, 2000, 137 p.) |  |  | Part I: Introduction to the PHAST | | | Purpose and overview of the guide | |  | Why use this guide? | | | Who this guide is for | | | What PHAST tries to achieve | | | What are participatory methods? | | | Why use participatory methods? | | | PHAST and empowerment | | | How the guide is organized | | | How to use the guide | | | Prepare before you start | | | Make your toolkit | | | Select the group | | | Group size | | | Should I follow the steps in order? | | | Moving from step to step | | | Keep records and activity outputs | | | Evaluate each activity | | | Some necessary background concepts | | | Diarrhoeal diseases and disease transmission | | | Health awareness and community change | | | Other uses of this guide | | | How to be a facilitator: some important points | | | (introduction...) | | | All participants are equal | | | There is no one right answer | | | Creating the right atmosphere | | | How to cope with dominant personalities | | | General instructions for all activities | | | Removing and storing PHAST materials for future use |
|
PHAST Step-by-Step Guide: A Participatory Approach for the Control of Diarrhoeal Disease (PHAST - SIDA - UNDP - WB - WHO, 2000, 137 p.)
Part I: Introduction to the PHAST
Purpose and overview of the guide
Why use this guide?
“The project has not come a day too soon. It has been an
eye-opener for the team. It provided us with an opportunity to observe at close
quarters the health problems of the underprivileged, undernourished and deprived
inhabitants of the slums. The team could observe the problems of slum-dwellers
in depth. These people have the zeal, understanding and willingness to improve
their lot. With a little initiative, constant follow-up and some services, they
could do away with unsanitary conditions, fight diseases and improve the
environment through this participatory approach.”
Comments received from community workers after field
tests of this guide in India
How many times have you seen something being done for a
community, although the community neither saw the need for it, nor supported it?
Failure is likely in such cases. The participatory approach outlined in this
guide aims to prevent such situations. The steps in the guide can help you to
enable community members to work out what they want to do, how it should be
implemented, how it should be paid for and how to make sure that the community
can sustain it in the future.
The participatory process leads to programmes that are much more
likely to be successful than those which impose solutions on communities. Take
the time to read on and see how straightforward this approach is. It will
involve a little more of your time now but will save you a lot of time in the
future. It will be worth the effort on your part because you will have better
results. You will find that the groups you work with will be much more
interested and involved in the activities you undertake together.
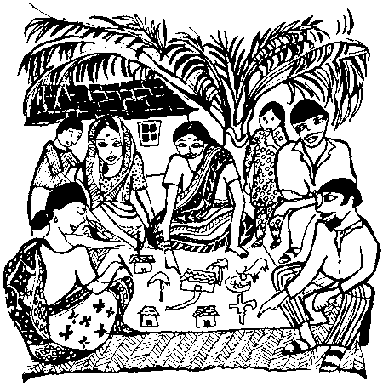
Figure
More particularly, in terms of hygiene and sanitation, this
guide:
- provides those working in water supply and
sanitation with a new model for changing hygiene behaviour
- provides those involved in the prevention of cholera and other
diarrhoeal diseases with a tool for empowering communities to eliminate such
water and sanitation-related diseases
- provides community workers with methods that can lead to
community management of water and sanitation facilities.
The participatory methods described in this guide will lead to
knowledge/empowerment and responsibility on the part of the community
with whom you work. So by using them, you can make an important contribution to
the fight for better environments and better
health.
Who this guide is for
This guide helps community workers to use a methodology for
community hygiene behaviour change and to improve water and sanitation
facilities. The name of this methodology is PHAST (Participatory Hygiene and
Sanitation Transformation). It is based upon another participatory methodology
called SARAR, which stands for Self-esteem, Associative strengths,
Resourcefulness, Action-planning, and Responsibility. (See the inside back cover
for details of how participatory approaches were developed.)
Before using this guide with communities, you must have received
training in either PHAST or SARAR. (See inside front cover for information on
training in participatory methods.) After training, the guide will serve as a
reminder of how to facilitate each activity. Once you have become familiar with
the sequence of activities, you will depend less on the guide.
If you are a project manager and interested in designing a
participatory workshop for community workers, Tools for community
participation: a manual for training trainers in participatory techniques,
by Lyra Srinivasan, will provide you with further
information.
What PHAST tries to achieve
PHAST seeks to help communities:
- improve hygiene behaviours
- prevent diarrhoeal
diseases
- encourage community management of water and sanitation
facilities.
It does this by:
- demonstrating
the relationship between sanitation and health status
- increasing the
self-esteem of community members
- empowering the community to plan
environmental improvements and to own and operate water and sanitation
facilities.
The methods for achieving these goals are called participatory
methods.
What are participatory methods?
Participatory methods encourage the participation of individuals
in a group process, no matter what their age, sex, social class or educational
background. They are especially useful for encouraging the participation of
women (who in some cultures are reluctant to express their views or unable to
read and/or write.) Participatory methods are designed to build self-esteem and
a sense of responsibility for one's decisions. They try to make the process of
decision-making easy and fun. They are designed for planning at community level.
Participants learn from each other and develop respect for each other's
knowledge and
skills.
Why use participatory methods?
Participatory methods have succeeded where other strategies have
failed. They are based on principles of adult education and have been
field-testing extensively.
Field experience has shown that participatory methods can lead
to a far more rewarding experience for community workers. Having tried
participatory techniques and found the experience worthwhile, community workers
usually do not want to return to their earlier methods.
The activities in this guide are based on principles of
participatory learning for sanitation change. These principles are explained in
a companion volume in this series entitled The PHAST initiative:
Participatory Hygiene and Sanitation Transformation. A new approach to working
with communities. (See
References.)
PHAST and empowerment
The PHAST approach helps people to feel more confident about
themselves and their ability to take action and make improvements in their
communities. Feelings of empowerment and personal growth are as important as the
physical changes, such as cleaning up the environment or building latrines.
These personal development principles are well illustrated by the following
quotations from people who have participated in a PHAST activity.
“I've been to a lot of community meetings
over the years but have never been able to speak out. Because I can't read and
write I lacked confidence. But with these methods I feel confident to speak.
When I see a drawing of a problem in our community, I say to myself, “I
know this problem and I can speak about it.””
“I used to think it was somebody else's problem and wait
for others to do something. Now I don't want to wait, I want to start work
now!”
“All my life people have been coming here and telling us
what to do. This is the first time anyone ever listened to what we
think.”
So it is important to evaluate the overall results of the
activities both in terms of sanitation improvements and empowerment. Communities
can find it very difficult, though, to evaluate their progress in terms of
behaviour changes, improvement in facilities, such as clean properly functioning
latrines, and effective use of these facilities. The guide therefore includes
activities to enable a community group to evaluate its progress. This would be
internal evaluation. Sometimes, an outside or external evaluation to provide
specific information, perhaps for comparison with another programme, may also be
required. If this is the case, you may need to involve someone with the skills
to collect this information and to write a report of their findings. You should
find out if information of this kind is needed before you start work with your
community group. If so, a participatory approach to monitoring and evaluation
should be used by the person(s) who will collect the information. They should be
involved from the very start, attend all the meetings and be treated in the same
way as any other participant. The outside evaluation person should involve the
community as much as possible in information collection and most importantly
report any findings to the group in a way it will understand and find
interesting.
Suggestions for designing an external evaluation can be found in
Hygiene evaluation procedures: approaches and methods for assessing water-
and sanitation-related hygiene practices. (See
References.)
|
Key definitions
A step may contain one or more activities, aimed at
achieving one overall objective.
An activity is what the group works through in order to
discover the information and skills necessary to reach understanding or take a
decision.
A toolkit is the set of materials (such as drawings) that
the facilitator uses as visual aids for facilitating activities. Different
participatory toolkits can be created - for example, one for diarrhoeal
diseases, another for nutrition and another for AIDS. Part III provides guidance
on how to create a toolkit.
Tools are the techniques and materials used by the
facilitator to help the group work through an activity. They should be adapted
to the environment and circumstances of the group you are working with. You can
also add to them on the basis of your own experience. See Part III for lists of
sample drawings. |
How the guide is organized
The guide has seven steps. The first five help you take the
community group through the process of developing a plan to prevent diarrhoeal
diseases by improving water supply, hygiene behaviours and sanitation. The sixth
and seventh steps involve monitoring (that is, checking on progress) and
evaluation. The information gained from these activities is used to work out
whether the plan has been successful.
Each step contains between one and four activities. Instructions
on how to facilitate each activity are provided under the following headings:
- Purpose
- Time
- Materials
- What to
do
- Notes.
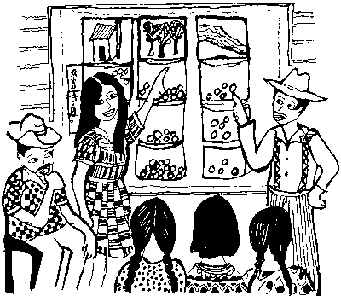
Most of the activities require the use of drawings or a chart,
called “tools”, to help facilitate the discussion.
The diagram shows the seven steps, outlines the activities of
each and the tools used. You may wish to tick off the activities and tools as
you complete them.

Seven steps to community planning
for the prevention of diarrhoeal
disease
How to use the guide
Prepare before you start
Before you begin working with a community group you must:
- Read through the entire guide carefully and make
sure that you understand the purpose and expected result of each activity.
- Read Part III, paying particular attention to the lists of
sample drawings for the activities. Make a list of the drawings you think you
will need.
- Find an artist to draw these pictures for you.3
Make sure the scenes and people they contain will appear familiar to the
community with whom you will be using this guide.
- Gather together all the materials you will need for the group
activities such as: the artist's specially prepared drawings, sticky tape,
marker pens, coloured paper, coloured stickers, large sheets of paper or
newsprint, card, small scraps of material, cotton, buttons, small stones, beads,
seeds, pebbles, scissors, pins, tacks, container (such as a basket, hat or box).
- Practise the activities with friends, colleagues or family
members until you feel comfortable.
3 You may have contacted an
artist earlier, who may have attended the training workshop with you. See Part
III.
Make your toolkit
Part III provides guidelines to help you prepare a set of your
own tools as well as sample lists of the types of drawings that you will need.
Please remember that these lists are provided as a guide only - toolkits must be
developed with drawings that match the people and environment you will be
working in. The customs, religion, class, dress, interpersonal relationships,
lifestyle, types of activities, buildings and facilities (such as water sources
and toilets), vegetation and animals shown should be like those of your group.
Caution: During an activity do not use glue or any other
permanent adhesive to attach the pictures because they will need to be moved
around, removed and
reused.
Select the group
Generally, participatory methods are used with small groups
(15-40 people) who want to improve their community in some way. In selecting a
group you will have to use your own judgement. But here are some examples of
typical groups to give you an idea of the sort of group you might choose and for
what purpose.
- A community wishes to improve the water and
sanitation facilities at a school. The parent-teacher association would be an
obvious group to work with. Some students could also be included to make the
group even more representative.
- A community worker is asked to help a community carry out
diarrhoeal disease prevention. After discussions with the health clinic staff
and village leaders, a group of about 30 people, who represent different village
interests, could be formed.
- The community already has a water committee of 15 persons.
Community leaders decide that this group should represent the community.
- An urban community of squatters, living in extremely bad
conditions without formal recognition by local government, is given an
opportunity to improve its environmental conditions. Normally such a community
has informal leaders. Discussions with these individuals lead to creation of a
working group that is representative of that
community.
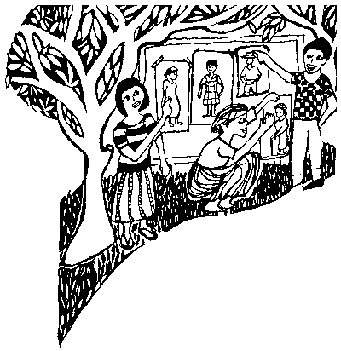
Group size
The activities in this guide will work best with groups of less
than 40 persons. Ideally, big groups will be divided into small groups of 5-8
persons for some of the activities, since they provide greater stimulus and
opportunity for participation. If this is done, the members of the small groups
should be swapped around for the different activities so that participants have
the chance to work with one another. Some competition between groups is also
quite healthy and desirable. Guidance is provided in the activity descriptions
on when the larger group should be divided into smaller groups.
Small groups can be invited to report their findings to the
whole group at the end of the activity. This can be done in one of two ways.
Each of the small groups can report its findings. Or, at the end of the
activity, just one small group (but a different one each time this method is
used) can be asked to make a report and the other small groups asked for
additional comments. The second method obviously takes less time. The
presentation of different points of view will help you to show that there is no
such thing as a single right answer.

Figure
Should I follow the steps in order?
The guide is divided into steps and each step is divided into
activities. Be sure to follow the steps in order since each step equips
participants with what they need to do or know to complete the next step. If a
step is missed, the group could have trouble with the activities of the
following step.
How much time does it take?
It could take from two weeks to six months to go through the
entire guide with a community group. The method aims to stimulate learning and
change, with enough time for information-sharing and feedback. Be sensitive, let
the group set the
pace.
Moving from step to step
How do I know when to move to tine next: step?
The group will make it clear when it is ready to move on. For
example, when it is ready to move from Step 2: Problem analysis to
Step 3: Planning for solutions, group members may start discussing
among themselves what they can do to overcome the problems they have identified.
Do I have to follow the activity times strictly?
The times given in the activity instructions are estimates only.
Be guided by the energy level and enthusiasm of the group. If the group appears
restless or bored, or if you are under time pressure, organize a break or plan
the next meeting accordingly. But do not tell the group how long you think it
should take to do an activity.
How can I move from one step to I he next?
If there has been a long break between steps, make sure the
group remembers what stage it had reached and what was decided. Review the
records (see next page) of the previous meeting. This is a good way of checking
that the group has understood and still agrees with what it decided earlier.
Can I change the activities?
Once you have gained sufficient experience and confidence, you
should feel free to make any changes in the order of the activities, or to
delete or add
activities.
Keep records and activity outputs
The group should keep a record of its findings and decisions for
each step. Usually these findings and decisions will be clear from the product
of the activity, such as a community map. The results of each activity
can be displayed on walls, perhaps in a community centre where the rest of the
community can see them. How records are made will depend on several factors,
including the literacy level of the group. Keeping records means participants
can quickly review their progress when they need to.
Certain ideas might have to be written down for display and to
give to those not directly taking part. Generally, it is best if the group
selects one or more volunteers to do this job. If no-one volunteers, you could
ask someone whom you think would do the task well.
Make sure records are brought to each meeting so that the
results of previous meetings can be reviewed easily. If the group is unsure what
to do, confused, unable to reach agreement, or if participation is slowing, you
may need to help the group review decisions and conclusions reached in past
sessions.
Evaluate each activity
Feedback on the relevance of activities, on what the group
thought was good or bad, and on where improvements could be made, is important.
So each activity should be evaluated at its conclusion and again, if possible,
before a new step or activity is
started.
Some necessary background concepts
Diarrhoeal diseases and disease transmission
Diarrhoea is generally caused by eating food or drinking water
that is contaminated with human faeces. Infants may suffer from diarrhoea after
being hand-fed by someone with dirty hands, or after having put dirty objects
into their mouths. The diagram below shows the usual ways diarrhoeal germs reach
people: via fingers, flies (insects), fields and fluids, food, or directly into
the mouth. Because of the use of so many “F” words in English, it is
often called the “F-diagram”. Yet such diarrhoea can mostly be
prevented. The table gives further information on diarrhoeal disease.

Figure
Illustration source: Winblad U & Dudley E,
1997.
|
Diarrhoeal disease: further information
What causes diarrhoea?
Germs found in human faeces entering the mouth.
These germs can be spread in water, food and by dirty hands or
objects.
For example, children may get diarrhoea if their mothers had
dirty hands or dirt under their nails when they prepared food for them.
Measles and some other illnesses. |
|
Why is diarrhoea dangerous?
Diarrhoea causes children and adults to lose too much liquid
from their bodies and can result in death.
Diarrhoea can also cause or make malnutrition worse because:
- nutrients are lost from the body
- nutrients
are used to repair damaged tissue rather than for growth
- a person suffering
from diarrhoea may not feel hungry
- mothers may not feed their
children normally if the latter have diarrhoea. |
|
How can you tell if someone has diarrhoea?
When someone has diarrhoea their stool contains more water than
normal and may also contain blood.
Evidence of diarrhoea is three or more loose or watery stools in
a day (24 hours). |
|
What should I do if someone has diarrhoea?
1. Give plenty of liquids to drink.
Give any of the following fluids:
- breast milk
- oral rehydration solution
-
plain water (boiled and cooled)
- soup, rice water, yoghurt
- juices, weak
tea, coconut water
- cooked cereal.
2. Give food.
3. Seek trained help, if the diarrhoea is serious. |
|
What can be done to stop people getting diarrhoea?
1. Safe disposal of faeces, particularly faeces of young
children and babies and of people with diarrhoea.
2. Handwashing after defecation or handling faeces, before
feeding, eating, or handling food.
3. Maintain drinking-water free from faecal contamination, in
the home and at the source. |
Preventing transmission
The aim of any community programme to prevent diarrhoeal
diseases is to block the transmission routes of germs. The “F-diagram”
stresses that good sanitation is a combination of facilities and behaviours. The
following three key hygiene behaviours lead to the greatest reduction in
diarrhoeal disease:
- Safer disposal of faeces, particularly
those of babies, young children and people with diarrhoea.
- Handwashing, after defecation, after handling babies'
faeces, before feeding and eating, and before handling food.
- Keeping drinking-water free from faecal contamination,
in the home and at the
source.
Health awareness and community change
Quality of life can improve considerably when a communal water
supply is replaced by domestic water supplies. Domestic water supplies mean that
users have more water for uses such as bathing and watering animals and gardens,
and greater privacy for defecation. Benefits such as convenience, privacy and
prestige are easily understood and can motivate a community to improve its
environment.
However, people often do not understand clearly how health is
linked to water and sanitation conditions. So bringing about such understanding
can help create long-lasting change. This guide includes non-traditional
teaching methods to help you do this.
How to increase health awareness
Health awareness comes about when people can describe how
diseases are transmitted in their environment and through their own behaviours.
This guide is based on the principle that people can and should understand how
diarrhoeal diseases are transmitted, and that this understanding may inspire
them to change their hygiene behaviours.
Once people understand how transmission occurs, they can
identify the different ways to block the transmission routes. They can also
weigh the advantages and disadvantages of blocking those routes in their
households and communities. Will it involve a lot of trouble, time and money?
What would be the benefit? Is it worth it? Three activities in the guide are
built around this principle of understanding. Good and bad hygiene
behaviours helps people to examine their existing hygiene behaviours,
while How diseases spread and Blocking the spread of disease
help them to understand how transmission takes place and how it can be
prevented.
A further principle is that it is wise for communities to
evaluate their current behaviours and facilities, and to make gradual changes to
them. In this way, they can make step-by-step improvements, ensuring that each
step is firmly in place (and can be sustained) before moving on to the next
step. The Choosing sanitation improvements activity illustrates
the process of defining steps for improving hygiene behaviour. (At the same
time, communities should also consider factors such as convenience, privacy,
status and dignity.)
Through participatory methods and better understanding of how
health is related to well-being and community development, a community can
become committed to implementing a plan for environmental
improvement.
Other uses of this guide
SARAR participatory approaches have been used for a variety of
different purposes. This guide has been designed for the control of diarrhoeal
diseases and the development of community management of water supply and
sanitation. But it could be modified and used for the control of other diseases
closely related to the environment, such as malaria, intestinal parasites,
schistosomiasis and dengue fever. It can also be redesigned for dealing with
issues other than those relating to environmental health, such as
AIDS.
How to be a facilitator: some important points
The most important thing to remember about being a
facilitator is that you are not a teacher!
Your role is to help or “facilitate”. Using the
activities in the guide, you can help groups to:
- identify issues of importance to them
- express
their problems
- analyse their problems
- identify possible solutions
-
select appropriate options
- develop a plan to implement the solutions they
identify and agree on
- evaluate the outcome of the plan.
So you must not:
- direct the group
- give information instead of
letting the group find it for itself
- advise or suggest what the group
should do
- make assumptions about what is the right response to an
activity
- correct the group.
If, for instance, you supply external information during the
early problem identification phase, you risk directing the group. The only
exception that should be made to this is when the group clearly asks for
specific technical information in order to move forward or if its information is
incorrect. This may be the case during the analytical or planning steps.
Using participatory methods does not reduce the role of the
community worker, but rather redefines it. What you do is encourage community
involvement. You try to create an environment in which the group can discover
information for itself. In so doing, participants will build the confidence and
self-esteem necessary to analyse problems and work out solutions.
As a facilitator, you are not a leader who directs the group to
where you think it should go. Instead, you help the group to better understand
its own situation and to make informed decisions about how to improve that
situation.
The only appropriate solution is the one that participants come
up with. As an outsider, you cannot understand their situation in the way that
they do, no matter how dedicated, interested or concerned you are. For this
reason, the group's input is more important than what you think or feel. It is
the group that will have to answer to the wider community and justify the
decisions it makes. As a final note: never underestimate the untapped potential
of the participants in your group and always provide them with the opportunity
to surprise themselves, and probably you too.
Figure
All participants are equal
The activities in this guide have been developed so that the
participation of each group member is considered equally important.
Additionally, you must be seen to be on the same level as the participants. So
you should not present yourself as an authority figure. Information should flow
from you to the group and from the group to you. By both sharing and receiving
information, you and the group will remain equal. Evidently, good listening
skills are
essential.
There is no one right answer
PHAST activities are open-ended. This means that there is no
correct answer or result. Decisions made by the group reflect what is right for
the group and what it is prepared to take responsibility
for.
Creating the right atmosphere
If the aim is to reach agreement on priorities for activities,
or a plan for improving hygiene behaviours and sanitation, participants must be
able to work well together. This is why participatory sessions often begin with
a fun activity, something to break the ice and make people laugh. You need to
maintain an atmosphere of relaxation throughout the planning process. Most
cultures have traditional games and songs that can be used to build group
spirit. The first activity which is called Community stories is
also a good
ice-breaker.
How to cope with dominant personalities
The SARAR methodology is specifically designed to stimulate full
group participation, and to make it difficult for strong personalities to
dominate the activities. However, from time to time the group process may not be
able to proceed because one individual wants to control the group's thinking.
If this happens, find out whether the dominant individual is a
designated leader, or simply a competitive or aggressive person with little or
no significant support or influence in the group. Competitive or aggressive
persons can either be taken aside and convinced of the importance of the group
process, or they can be given separate tasks to keep them busy and allow the
group to carry on. If the persons concerned are community leaders, approach them
formally or privately early in the planning phase, explain the process, and try
to gain their support. Hopefully, you will convince them that allowing community
members to fully and equally participate will result in personal growth and
betterment for
all.
General instructions for all activities
1. Have all the materials for each activity ready
before starting.
2. Make sure the materials are large enough to be seen by all
participants.
3. Try to limit the size of your group to no more than 40
persons.
4. Make sure that people can talk to one another easily; use a
circle where possible.
5. Begin each new session with a warm-up activity such as a game
or song.
6. Go through each activity one step at a time and follow the
instructions in the guide.
7. Be guided by the requirements of the group when facilitating
activities. The time given for each activity is only an estimate.
8. When giving the group its task, use the exact words provided
for this purpose.
9. Encourage and welcome the input that individuals make.
Remember, there are no wrong answers.
10. Facilitate the group, do not direct it.
11. Try to encourage the active participation of each
participant. Be careful not to find fault or make critical comments when you
respond to people.
12. Take into account the participants' literacy level and work
out ways in which they can keep records of what is discussed and agreed.
13. Have the group keep the materials and records in a safe
place.
14. At the end of each activity, ask the group members to
evaluate each activity on the basis of what they have learnt, what they liked
and what they did not like.
15. At the end of each session, congratulate the group members
on their efforts and explain briefly what will be covered at the next session.
16. At the beginning of each new meeting of the group, ask the
group to review what it has done so far and the decisions it has
taken.
Figure
Removing and storing PHAST materials for future use
Plan ahead on how you will remove and store the materials for
future use. Organize a team well ahead of time to take pictures off the walls
and pack materials away (in large envelopes or boxes which are carefully
labelled) after the final meeting. If possible, prepare a checklist of all the
materials so that nothing is left behind or
lost.
