Back to Home
Page of CD3WD Project or Back to list of CD3WD Publications
 |  |  | Permanent Farming Systems Based on Animal Traction: Farmers Handbook (GTZ, 1995, 183 p.) |  |  | PART V: The permanent farming system | |  | (introduction...) | | | 5.1 Meaning and objectives of a permanent farming system | | | 5.2 Conservation of the soil | | | 5.3 Improvement of the soil |
|
Permanent Farming Systems Based on Animal Traction: Farmers Handbook (GTZ, 1995, 183 p.)
PART V: The permanent farming system

Figure
5.1 Meaning and objectives of a permanent farming system
-A Permanent Farming System is adapted to
ecological, social and economic conditions:
adapted to ecological conditions means:
farming methods, which reduce erosion and h iron tines soils;
adapted to
social conditions means: the farming methods are acceptable to the farmers and
appreciated by the farmers;
adapted to economic conditions means: the farmers
can afford the new farming methods and can increase their income by using the
new farming methods.
-A Permanent Farming System is mechanized by the use
of draft animals in order to:
reduce labour burden,
accelerate farm
work,
increase the farm area, production and income of the
farmers
Permanent fanning methods should improve the living conditions
of farmers.
Improvement of living conditions means:
-having less and easier work,
-having more time
for themselves
-having more and better food, and
-having more income for
school fees, health care, etc.
5.1.1 THE ELEMENTS OF THE PERMANENT FARMING SYSTEM
The new permanent farming system has a lot of elements, which
are working hand in glove to improve farming:
-Making Contour Bonds (trig ridges) along contour
lines prevents erosion;
-Planting of permanent and seasonal crops reinforces
the contour bonds and produces a lot of food and income;
-Small ridges
prepared by oxen between the contour bonds prevent erosion and provide optimum
growing conditions for seasonal crops;
-Mixed cropping and crop rotation of
seasonal crops conserves the soil, protects against diseases and guarantees good
yields;
-Planting of legumes improves the soil fertility for
higher yields;
-Draft oxen, used for farm work reduce the labour burden and
accelerate farm work;
- With the draft oxen, you can increase the size of
your farm, your production and your income;
-Keeping of draft oxen in the
cowshed during the night protects the oxen and allows &e production of
cowdung;
-Use of cowdung and green manure reduces the expense of mineral
fertilizer, improves the soil and increases the yields;
- Vegetable gardening
improves the family diet and produces additional income by marketing of surplus
vegetables;
-Working of one big farm with the family reduces the labour
burden for the individual family members and guarantees continuation of farm
activities when one family member is sick.
5.1.2 What is a Permanent Farm and why do we practise Permanent
Farming?
A permanent farm is a farm, where you crop every year
continuously and forever without shifting to another farm.
We practice permanent farming because:
-with the increase of population, the land becomes
short and shifting to a new farm becomes difficult,
-when shifting to a new
farm you have a lot of work to clear new farm land and if land is short, you
have to shift to very steep hillsides, which are tedious to work and subject to
erosion;
-a permanent farm is better protected against
bushfires;
-a permanent farm allows continuous production, a
permanent farm reduces transport or walking time to scattered traditional
farms;
-after some time, you know your permanent farm very well and you know
which crops to grow on which plot of your permanent farm
5.1.3 Why do we use Draft Animals?
The traditional way of farming with the hand-hoe is tedious and
not very efficient. With the help of draft animals you can mechanize nearly all
farm works, like clearing, plowing, harrowing, planting, ridging, weeding,
moulding and transportation. With the draft animals you:
-reduce your labour burden: farm work becomes
easier;
-accelerate working operations: farm work becomes faster;
-can
increase the size of Your farm land: production increases;
-can produce
manure and increase yields without buying expensive mineral fertilizer
-can
do contract labour to help other farmers and increase your income.
5.1.4 How to Farm permanently
When the traditional farmer his fallow period or starts to crop
permanently on one farm, he will soon recognize, that: the soil becomes less
fertile and yields decrease.
In addition, bush fires or the farming method of bury and burn
as well as the heavy rains, which carry away the soil, reduce the soil
fertility.
To make a farm permanent, we therefore have to protect, conserve
and improve our soil, to have a good yield every
year.
5.2 Conservation of the soil
The soil is a living thing like man, animal and plant.
Conservation of soil means, keeping its power active to produce food. If you
don't protect it against "soil diseases" or if you overwork your soil without
adding soil food, it will have no Power to produce and will die". The most
important enemies of the soil are fire and erosion.
5.2.1 flow to Protect the Soil against Fire:
Destruction of soil by fire can be caused by the farming method
of bury and burn of organic matter or by wild bush fire.
Practise fire dressing to avoid bush fire in your farm. Bush
fire can destroy your
-farm
-cowshed
-house and can be dangerous
even to your own life and the life of your family.

Fig 5.1: Do not practise bury and hum
of organic matter hut bury your organic matter only
If you clear your farm at the beginning of the dry season and
bury all the organic matter, bush fire cannot enter your farm because bare soil
cannot burn.

Fig. 5.2: Clear your farm at the
beginning of the dry season and bury all the organic matter.
Only when you leave crop residues (maize stover,etc.) or grass
on your farm, can bushfire enter and destroy your soil life.

Fig. 5.3: Any fire on your farm will
burn organic matter (grass, etc.) which is important as food for the soil.
Fire will also destroy the life in the soil such as microbes
which act like a stomach and change organic matter into plant food. Fire will
also destroy the structure of the soil. The soil will lose its strength and will
easily be carried away by wind and water.
Apart from fire, erosion can destroy your soil. If the soil is
carried away by water, we call it water erosion. If the soil is carried away by
wind, we call it wind erosion.
5.2.2 How to protect the Soil against Water Erosion
Only running water can carry away soil. Running water you find
on sloping land. The steeper the slope, the more power the water develops and
the more soil it washes away. We have to stop the power of running water to
prevent erosion.
To stop running water on a slope, we have to cultivate along
contour lines and build dams or ridges along the contour lines.
A contour line is an imaginary line running across the slope,
where all points on this line are on the same level of altitude. This means: If
you make a dam according to this line, water will stop and will not continue in
any direction but will seep into the soil.

Fig 5.4: Do not cultivate in the
direction of the slope. Water flows fast between the ridges and carries away the
soil; Fig. 5.5: Plant along contour lines when ridges are made across the slope
water cannot run and carry away the soil.
How to determine the contour line:
The contour line will follow the topography (surface) of the
land. You cannot determine the contour line with your eyes. To determine the
exact contour line, we use a special instrument, The Rauch Contouring
Instrument:

Fig. 5.6: The Rauch Contouring
Instrument consists of a transparent plastic tube fixed to two wooden sticks
with centimetre marks ranging from 0 to 120. With this instrument, you can
determine the slope of the land and the contour line.
How to determine the slope:
You fill the transparent tube with water. Take care that no air
bubbles remain in the tube. Put the sticks upright on level ground near each
other and add water until the water levels reach the marks "one hundred" on the
sticks.
Put the sticks 1 m apart following the direction of the slope.
Read the difference of the water levels at the marks on the sticks. The
resulting figure is the slope of the land.

Fig. 5.7: Example for determining the
slope %age using the Contouring Instrument.
Example:
Reading on stick 1 = 110 cm
Reading on stick 2 =
90 cm
Difference = 20 cm
Slope = 20 %
The percentage of the slope
determines the distance between the contour lines. On steep slopes, the distance
decreases. Apply the following distances between contour lines, according to the
slopes.
Below 5 % = 10 m
5 - 10 % = 8 m
10 - 15 % = 7 m
Above
15 % = 5-6 m
Prepare sufficient sticks to peg the contours on your field and
support your field extension worker, because he cannot do the work alone. Invite
your family members and other oxen farmers to finish the exercise as fast as
possible, because the extension worker has a lot of fields to contour for other
farmers.
How to establish contour bonds:
To accelerate the layout of contour lines for a field, you
establish a reference contour line and measure out the other contour lines at
the distances given the corresponding slopes.
But before you start to determine your reference contour line,
you have to survey your field and answer the following questions:
-is the topography of the field uniform or do I have
to divide the field into subplots with individual reference contour
lines?
-how many reference contour lines do I
need?
-where do I start my reference contour line?
You start the reference contour normally in the middle of the
field or the subplot and measure the other contour lines outwards from the
reference contour. If you still have a fault in your reference contour, the
multiplication factor for the fault is less when you start in the middle of the
field.
For the layout of the reference contour, you fill your
contouring instrument as indicated above. You fix a starting point and keep one
stick at the starting point. With the second stick, you shift ahead by the
length of your tube. When the water level has calmed down, you read the mark on
the stick at the starting point and compare it with the reading on the second
stick. If the second stick shows a higher figure, you move up the slope. If the
second stick shows a lower figure, you move down the slope. When the reading on
the sticks correspond, the sticks are on the same level of altitude. You mark
the points and take the point of the second stick as reference point to continue
the exercise on the whole width of the field.

Fig. 5.8: Collect the organic matter
and put it along the contour lines. Cover the organic matter with soil.
When you have determined the reference contour line, you have to
adjust the line to correct sharp bends and corners, to enable your oxen later on
to follow easily the contour line during work.
For the layout of your contour line, contact your extension
staff.
After the laying out of the contour lines, you have to establish
big ridges along these lines to stop running water. These big ridges we call
contour bonds.
For the establishment of the contour bond, you need a lot of
organic matter. Therefore, don't burn the organic matter after clearing.
The establishment of a contour bond is a tedious job, but you do
it only once, at the beginning of your farm establishment.
To reinforce the contour bonds and make them permanent, we have
to plant permanent crops as soon as the rains start.
The contour bond protects your soil against erosion and
contributes to your farm income.

Fig. 5.9: Apart from permanent crops
which guarantee a long-term income, you can plant seasonal crops like: beans,
soya beans, ground nuts, corn, bitter leaves, pepper, okra, etc. for fast
income.

Fig 5.10: Planting root and tuber
crops on contour bonds is only reasonable on flat slopes.
After harvest of root and tuber crops, you have to refill and
reestablish your contour bonds.

Fig. 5.11: Plant permanent crops on
the contour bonds to reinforce them.
NO ! Don't plant root and tuber crops on
the contour bond; when you have a steep slope
YES ! Plant permanent crops to
reinforce the contour bond
How to control erosion between the contour
bonds:
During heavy rains, erosion can occur between the contour bonds and
destroy your young plants when planted on the flat.
To prevent erosion between the contour bonds, we plant on ridges
prepared along the contour bonds. Planting on ridges has several other
advantages in addition:
-The plants have a better seed bed,
air and water are stored better in
ridges;
your plants germinate better;
the roots of the young plants can
develop better.
-Ridges can easily be filled with a lot of manure
for higher yields.
-Weeding is easier on ridges, especially when you use the
ridger.
-The soil on ridges dries off faster and prevents especially fungal
diseases from spreading.
-Harvest of root and tuber crops is
easier.

Fig. 5.12: Small ridges prepared by
oxen along the contour bonds prevent erosion between the contour bonds and
provide optimum growing conditions for seasonal crops.

Fig. 5.13: The field ridges between
the contour bonds are established with the help of the oxen and the ridger.
Other methods to prevent water erosion:
Apart from the
establishment of contour bonds and planting on ridges, there are additional
methods to prevent erosion.
Erosion can be reduced by covering the soil.
You will hardly find erosion on soil completely covered by
plants like on good pastures or in forest areas.

Fig. 5.14: Covering the soil with
plants or mulch reduces erosion. The rain drops cannot fall directly onto the
soil. They fall onto the leaves, ten they run gently down to the earth and have
no power to carry away the soil.
On our farms, we cover the soil with farm crops. To achieve a
good, permanent soil cover during the rainy season, we practise mixed cropping
and double cropping.
Mixed cropping means: We combine different plants in one field
to get a higher plant density that covers the soil better.

Fig. 5.15: A mixed crop of maize and
beans on one ridge.

Fig. 5.16: Double Cropping means:
Planting a second crop immediately after the harvest of the first season crop.
Mulch is another method to cover the soil and protect it against
erosion.

Fig. 5.17: Living mulch like
Crotalaria or Desmodium can be used on the farm.
Maize on the ridge and a cover crop (e.g. Crotalaria) in the
furrow.

Figure
Surface mulch like crushed grass and plant residues should be
used on smaller herds like gardens. It involves a lot of work and time.
5.2.3 How To Protect your Soil against Wind Erosion
Wind can attack the soil only when:
-the wind is powerful;
-the soil is bare,
and
-the soil structure is damaged.
To break the power of the wind, you have to establish wind
breaks.
A well established contour bond with permanent crops can reduce
the power of the wind. In addition, you can establish wind breaks at the comers
of your farms with trees and hedges to break the wind. Trees and hedges can also
serve as a living fence for your farms, to protect them against destruction by
cattle.

Fig. 5.18: Wind cannot attack the
soil easily, when the soil is covered by plants, which break the power of the
wind and strengthen the soil structure with their roots. A good plant canopy,
covering the soil, reduces wind erosion.
Practise mixed cropping with a high plant population and double
cropping to have a good soil protection.
A soil with a poor structure is easily attacked by wind erosion.
Therefore you have to protect and improve your soil structure:
-avoid bush fire;
-cover the soil with plants or
mulch to protect it against sun,
-add cowdung, plant residues (corn stalks, etc.) and
green manure to the soil; and reduce soil preparation (reridging instead of
plowing and
harrowing).
5.3 Improvement of the soil
To allow permanent fanning activities on a farm with good
yields, you have to improve the soil. The use of manure, organic farming, mixed
cropping, crop rotation and use of mineral fertilizer wilt help you to improve
your soil for steady and high yields.
For a draft animal farmer, dung is the most important manure. It
is free of charge because it is produced by his draft animals. When applied
sufficiently on the farm, dung will improve the soil and increase the yields of
the crops. The crops will produce more food for man and animals.

Fig. 5.19: Manure and compost help to
return organic matter to the fields.
5.3.1 How to Produce Cowdung
To produce cowdung, it is necessary to keep the animals in a
cowshed during the night to collect faeces and urine. Dung from animals which
roam around is lost to your farm
The quantity of your cowdung depends mainly
on:
-he size of your cattle
-the feeding of your
cattle
-the amount of litter in your cowshed
A larger animal produces more dung than a smaller one. A
well-fed animal produces more dung than a poorly fed one.
Allow enough grazing time during the day and add 10 kg of fresh
grass every day, when you put your oxen into the cowshed.

Fig. 5.20: The litter you put into
the cowshed gets mixed with the dung, rots and produces manure. In addition, it
collects the urine.

Fig. 5.21: Dry litter must be added
every day

Fig. 5.22: Litter provides dry
bedding for your animals and increases the amount of manure you produce.
Cowdung will save you a lot of money. You don't need to buy
fertilizer. In addition, it will improve your yields.
A pair of oxen can produce about 4 tons of rotten manure per
year when
-kept in the cowshed during the night
-well
fed
-enough litter is applied
This corresponds to about 8-10 cart loads per year.

Fig. 5.23: When the manure is well
rotted, it can be transported to the field.
Before the cowdung can be brought to the farm, it must be
rotten. A reasonable oxen farmer has two rooms for his oxen. He will keep his
oxen in one room until the manure heap is large enough. He will then change the
oxen to the second room, while the cowdung in the first room is left to rot.
5.3.2 How to produce Compost
All organic waste materials (kitchen waste, weeds, grass, crop
residues, etc.) can be used for compost. Compost can be used as organic
fertilizer on the farm and especially in the garden.
Choose a cool place for the establishment of your compost heap.
Peg a square with 4 poles at a distance of 2-3 metres.
Throw all available organic waste materials on the ground within
the four poles. When the layer of organic matter is about one handspan high you
spread a thin layer of humus soil or manure. You continue to put organic matter
(1 handspan) and manure (thin layer) until your compost heap is about 1 metre
high.

Fig. 5.24: Keep your compost moist
throughout. Adding well rotten compost to manure and organic wastes speeds up
the rotting process.
Compost must be moist. In the dry season, you have to water your
compost and protect it against the sun. Cover your compost heap with leaves or
grass and leave it for some time to rot before applying to the field.
For complete rotting, you have to turn your compost after some
time (4-6 weeks after complete establishment). Mix the organic matter and put
the outer layers inside and the inner layers of the compost outside. Especially
when you use your compost for gardening, it needs complete rotting
5.3.3 How to produce Green Manure
As a draft animal farmer, you crop a large farm. You may not
always have enough dung or compost to improve all plots of your farm. To keep
all plots fertile, you need green manure in addition.
Green manure is manure from special manure plants or crop
residues.
Many Green Manure Plants do not produce direct food, but they
improve the soil. Plants that are cropped after applying green manure produce a
lot of food.
Some popular green manure plants are the following ones:
- Tephrosia
- Sesbania
- Crotalaria
-
Leucaena
- Pidgeon Pea
In addition, green manure plants have many other advantages:

Fig. 5.25: Green manure plants have
many benefits..
Green manure plants are planted:
-in mixture with food crops;
-on contour bonds,
and .
-as a sole crop on fallow areas.
If you mix green manure crops with food crops, you produce food
and manure at the same time. You may not have the same yield as with sole
cropping of food crops in the first year, but in the following years, you will
harvest more on the green manure field, because you conserve and improve your
soil by this method.
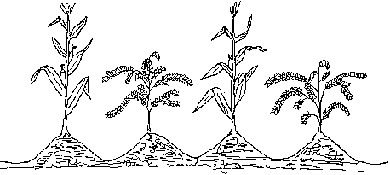
Fig. 5.26: A mixed crop of maize and
sesbania
The planting of green manure crops on the contour bonds has the
following advantages: you reinforce and enrich your contour bonds through the
root system of the green manure crop (tephrosia, sesbania, etc.) the green
manure plant can be left for seed production after the seed harvest, the green
manure plant can be pruned and used as manure for the field between the contour
bonds.

Fig. 5.27: Fresh branches and leaves
of the green manure crop can be cut and spread as mulch m the field.
If you have a very poor soil, you may have to fallow your farm
Under natural fallow, it will take long time until the soil becomes fertile
again

Fig. 5.28: Under a planted fallow
with Green Manure Plants, the soil becomes fertile again within 1 or 2 years.
Green Manure Plants can give 20-80 tons of fresh organic matter
per hectare per year. This will save you a lot of fertilizer.
5.3.4 How to bury Organic Matter
To avoid loss and improve the decomposition of organic matter
from plant drop, we have to mix it with the soil. The oxen farmer uses the cart,
the roller cutter and the ridger for this exercise.
With the cart, he transports the manure to the farm.
With the roller cutter, he can clear plant residues.
With the ridger, he buries the organic matter into the soil.

Fig. 5.29: How to bury organic matter
in a ridged field.
The buried organic matter gives humus to the soil. We call this
organic farming. It improves your soil and the following crop will produce a lot
of food.
5.3.5 Mixed Cropping
To conserve and improve our soil, we have to practice mixed
cropping. Mixed cropping is the planting of two or more crops on the same field
at the same time.
To keep the soil in balance, we combine (mix) crops which make
the soil poor, with crops which improve the soil.
Crops which make the soil poor are:
- maize
- rice
- wheat
- yam
-
cassava
- cocoyam
- potatoes
Crops which improve the soil are legumes like:
- ground nuts
- beans
- soya beans
-
peas
- green manure plants

Fig. 5.30: A crop of maize mixed with
beans:
Apart from soil conservation, mixed cropping has a lot of other
advantages: a mixture of crops with different root systems will use the
different layers of the soil better, that means: they use the available water
and nutrients better.
- mixed crops with different preferences for
nutrients, use the different minerals available in the soil better.
- mixed cropping results in a higher plant
population per unit area and increases yields.
- the higher plant density in
mixed cropping reduces soil erosion and suppresses weed growth.
- mixed
cropping reduces the risk of pests and diseases infestation.
- mixed cropping
diversifies the food supply. You have different quality food for your family
diet.
- mixed cropping reduces the risk of complete crop
failure. If one crop fails, the other crops can still produce enough food for
the farmer family.
5.3.6 Crop Rotation
If the same crop is grown in the same field every cropping
cycle:
-the soil becomes poor;
-pest and disease
infestation increases;
-the harvest gets smaller.
If the crops change on the same field every cropping cycle:
-the soil does not become poor;
-pests and
diseases do not increase easily; .
-the harvest can stay good.
To change crops on the same field every cropping cycle is called
crop rotation. The advantages of crop rotation are similar to mixed cropping:
Crop rotation:
-conserves the soil fertility: Crops which make the
soil poor are followed by crops which enrich and improve the soil; e.g. Maize
followed by beans.
-controls pests and diseases; Pests and diseases
developing on one crop cannot affect a crop of another family; e.g. Cocoyam
followed by Cassava.
-improves the use of different layers of the soil; Crops
with a shallow root system are followed by crops with a deep root system; e.g.
Beans followed by Cassava.
-improves the use of different minerals available
in the soil; e.g. Cereals need more nitrogen while tuber crops need more
potassium.
To get all possible advantages, combine mixed cropping with crop
rotation. Recommended crop rotations with mixed crops for different areas of
altitude are indicated on the following pages.
[TREATMENTS - CROP ROTATION ON MEDIUM ALTITUDE (lower than
1500m)
INDIVIDUAL PLANTING ARRANGEMENTS
Treatment 1 or Plot 1
(between first and second contour bond)
Maize and Green Manure:

Fig. 5.31: Maize and Green Manure on
alternate ridges.
Distance between ridges: 80 cm.
Distance between maize plants on the ridge: 25 cm.

Fig. 5.32: Maize on ridges, green
manure in the furrow.
Distance between ridges: 80 cm.
Distance between maize plants on the ridges: 30 cm.
Green Manure Crops can be Tephrosia, Sesbania, Crotalaria solely
or as a mixture.
Treatment 2 or Plot 2 (between second and third contour
bond)
Maize and Beans and Cocoyam:

Fig. 5.33: Maize and Cocoyam/Beans
are planted on alternative ridges.]
Distance between the ridges: 80 cm.
Distance between maize
plants on the ridges: 25 cm.
Distance between the cocoyam: 60 cm.
Beans
interplanted between cocoyam: 10-15 cm distance
NOTE: - Split maize ridges after harvest and add soil to Cocoyam
edge.
Treatment 3 or Plot 3 (between third and fourth contour bond)

Fig. 5.34: Maize and Food Legume are
planted on alternate ridges.
First Season
Maize and Food Legume: (Beans, Soyabeans, Groundnut)
Distance
between the ridges: 80 cm.
Distance between the maize plants on the ridges:
25 cm.
Distance between the food legumes: 10-15 cm. (see Chapter 6.4.)
Second Season:
Food Legume and maize on 80 cm. ridges or
Food Legumes on 50
cm. ridges or
Food Legumes and potatoes on 80 cm. ridges or
Potatoes or
Sweet potatoes only or
Green Manure.

Fig. 5.35: Legumes and maize mixed -
Food legumes and potatoes mixed.
Treatment 4 or Plot 4 (between fourth and fifth contour bond)

Fig. 5.36: Potatoes are cropped
solely on ridges or on alternate ridges with food legumes.
First Season:
Food legumes (Beans, Soyabeans, Groundouts).
Food legumes are
cropped solely on ridges.
Distance between the ridges: 50-60 cm.
Distance
between the plants on the ridges: 10-15 cm.
Or Potatoes (high altitude areas):
Distance between the
ridges: 80 cm.
Distance between the plants on the ridges: 30-40 cm.

Fig. 5.37: Cereals are planted flat.
The planting method is drilling.
Second Season:
Cereals: (Upland Rice, Wheat)
The distance
between the rows: 20-40 cm, depending on the weeding implement used.
The
recommended seed rate for cereals is about 100 kg/ha.
Tubers:
Plant Sweet Potatoes after harvest of first season
crop. Re-ridge and plant 3040 cm long cuttings.
Planting distance between ridges: 70-80 cm. Planting distance
between the plants on the ridges: 50-60 cm.
Food Legumes:
Planting distances: see first season.
Green Manure:
Broadcast available legume seed, preferably
Crotalaria after harvest of first season crops.
NOTE: Select your season crop according to the climate of your
area and characteristics of the crop.
5.3.7 Mineral Fertilizer
The use of dune, compost and green manure crops help to maintain
and improve the soil fertility, but every year a part of the crops is either
consumed by the farmer's family or sold.
The nutrients of these crops are lost to the soil. They have to
be replaced. We can give back these nutrients (plant food) to the soil m the
form of mineral fertilizers.
Mineral fertilizers are artificial fertilizers, which can add
nutrients to the soil and increase the yield of crops.
There are three main plant nutrients which are necessary for
plant growth: nitrogen (symbol N) phosphorous (symbol P) potassium (symbol
K)
Each of these nutrients has special effects on the plant.
Nitrogen (N): makes the plant grow quickly. gives the plant a
nice green color . makes the plant grow strong,

Fig. 5.38: When Nitrogen is lacking,
plants are generally weak and pale.
The main Nitrogen Fertilizers are:
- Sulphate
- Nitrates
- Urea
Not only these mineral fertilizers add Nitrogen to the soil, but
also the Leguminous Plants.
(Beans, Soyabeans, Groundnuts, Cowpeas, Mucuna).
Phosphrus(P):

Fig. 5.39: Phosphorous makes the
stem and the roots strong. Phosphorous helps the plant to form flowers and
fruits.
The main Phosphorous Fertilizers are
-Natural Phosphates
-Super
Phosphates.
Potassium(K):

Fig. 5.40: Potassium helps plants to
build up reserves and to resist drought and diseases.
The main Potassium Fertilizers are:
-Natural Potassium
-Potassium
chloride
-Potassium sulphate
Common commercial fertilizers
1. N P K 20/10/10
The figures indicate the percentage of the different nutrients
in one bag.
|
e.g. |
1 bag 20/10/10 with 50 kg. contains: |
|
|
20% Nitrogen = 10 kg. |
|
|
10% Phosphorous = 5 kg. |
|
|
10% Potassium = 5 kg. |
2. N P K 10/30/10
3. Ammonium-Sulphate
This fertilizer contains about 21%
Nitrogen. It is not recommended, because it will make the soil acid. Acid soil
is not good for plant growth.
4. Urea
This fertilizer contains about 46% Nitrogen. It is
good for top dressing to support heavy plant growth.
How to apply fertilizer
The fertilizer has to be applied at the correct time and the
correct place.

Fig. 5.41: We give fertilizer as a
basic application before or at planting time. Spread your fertilizer before
ridging or reridging. When you mould up your edges, fertilizer is mixed with the
soil.
Fertilizers for basic application are NPK 20/10/10 and NPK
10/30/10.
After plant establishment (3-5th week after germination) we
support the plant development with a top dressing. The top dressing can be
combined with weeding to save a working operation. Applv the fertilizer in the
furrow. When earthing up the ridges or reridging, the fertitizer will be mixed
with the soil and moved near the plant roots.

Fig. 5.42: Top dressing, application
of fertilizer into the furrows

Fig. 5.43: After applying the
fertilizer in the furrow the fertilizer is mixed with the soil and moved nearer
to the plants with the ridger-plow
Fertilizers for top dressing are Urea and 20/10/10.
For the
recommended rates of fertilizer, see Chapter VI for the specific
crops.
