
| Amaranth to Zai Holes, Ideas for Growing Food under Difficult Conditions (ECHO, 1996, 397 p.) | ||||||
| 17: Above-ground (urban) gardens | ||||||
| (introduction...) | ||||||
| Overview of above-ground gardening | ||||||
| Technical details of above-ground gardens | ||||||
| Urban agriculture resources | ||||||
|
| ||||||||||||||||||||||||||||||||||||||||||
Urban food production is an area which has been too frequently overlooked by development planners, considering global urbanization and the surprisingly large amount of food already produced in cities. Beyond the sites traditionally used by urban gardeners, there is considerable potential to involve millions of urban families, who may not at first thought seem to have a location to garden. This untapped potential is found where there is plenty of sunshine but either no soil or the soil does not lend itself to cultivation. ECHO and others have developed several "above-ground" techniques suited for such sites.
Where might sites for these above-ground gardens be found? For starters, in many cities there are countless hectares of sturdy, flat cement rooftops and many more hectares of tin roofs on insubstantial shanties. There are also steep hillsides, extremely poor soils, yards of rock or cement, spaces around tree roots, and places where land tenure is so unstable that only portable gardens are attractive.
Such areas were a natural challenge for us, since one of ECHO's purposes is to help people grow food under difficult conditions. There are few "soils" worse for gardening than a cement slab, a pile of rocks, a corrugated roof or a mass of tree roots. However, large areas of such unused but potentially prime growing space are often located in cities, near large markets and numbers of underemployed people. The potential value of creating growing areas in such locations is obvious.
Since 1982, ECHO has been working on methods for gardening in such situations, which are not nearly as difficult a challenge for gardening as one might think. In fact, cement slabs have become one of our favorite gardening spots in Florida, where sandy soils and nematodes make in-ground gardening a challenge. Urban gardening has a reputation of not being very successful. This chapter takes a second look at growing food in the city.
SOME CRITERIA FOR ABOVE-GROUND GARDENS. (1) They must be made from local materials, not from something imported into the country. (2) They must be inexpensive to construct, preferably using recycled materials approaching no cost at all. (3) They must have a very low weight per area of growing space (unless located on the ground). (4) The emphasis should be on obtaining satisfactory production with minimal inputs, rather than maximum possible production with high inputs (which is the usual goal of hydroponics). (5) No instruments or analyses should be needed for routine operation.
A LOOK AT FOUR ABOVE-GROUND GARDENING METHODS. [Please note: One inch (") = 2.54 cm.]
Shallow Bed Garden
The Shallow Bed Garden is a 3-6" bed of compost. To keep weight to a minimum, no soil is used. If compost is not available (a likely situation), plants can be successfully grown in fresh organic matter of many kinds. Such beds are fertilized and covered with at least a thin covering of compost or soil. Almost any vegetable can be grown in shallow beds. Once the beds are established, they are like regular gardens except in their need for more frequent watering.
Shallow Pool Garden
The Shallow Pool Garden consists of a shallow pool of water 0.5-3" deep. Usually a sheet of plastic of the desired size is formed into a pool by laying sticks under each of the sides. Shallow beds made of any material that does not tend to become waterlogged are then built in the pool, extending at least 2" above the water line. The length of time between waterings can be extended by making a bucket waterer. [To make a bucket waterer, drill a 3/8" hole into the tight-fitting lid of a 5-gallon plastic bucket, about 1 inch from the edge of the lid. Fill the bucket with water (optionally containing a soluble fertilizer) and place it upside down in a cleared spot in the "pool."] Place a stick under the bucket lid at the point nearest the hole to allow air to enter under the bucket. This results in a constant shallow pool of nutrient solution in the bed, the depth of which is determined by how much the stick raises the edge of the bucket.
Wick Garden
The Wick Garden consists of a piece of polyester cloth (the "wick") laid out on a flat area in the shape of the desired garden and a 5-gallon bucket waterer (see above) placed directly on the wick. Set the root balls (the roots and soil attached to plants in their starting containers) of transplants directly on the wick. Finish the beds by filling in around the plants to a depth of 3-6" with some extremely airy material such as pine needles, pieces of coconut husk, or even cola cans. It is important that this material be something that will not become waterlogged. Leave a section of the cloth clear to hold the upside-down bucket. The wicking action of the cloth spreads water and nutrients to the roots, which grow above and below the surface of the cloth. Sometimes the cloth is first covered with a thin layer (0.5-1") of compost or potting soil. Best results are found with short or trailing vegetables and herbs, such as onions, radishes, lettuce and mint.
Tire Garden
Tire Gardens. The tire gardens are portable gardens that can literally go almost anywhere. The garden is made from an old tire and a small sheet of plastic film (e.g. a garbage bag). Construction is simple and elegant. Lay a tire flat on the ground. Note that the top rim is a mirror image of the bottom rim. With a knife or machete, cut off the top rim. Place a piece of plastic inside the tire on the bottom rim, large enough so that an inch or two of plastic stands up along the walls of the tire. Now turn the top rim that has been cut off upside down. It fits like a lock on the bottom rim, holding the plastic firmly in place. Fill with growing medium, usually starting with lightweight, airy materials on the bottom and soil or compost on the surface. If the plastic is trimmed to near the bottom of the tire, the garden will essentially be a portable "shallow bed garden." If the plastic is left so that a pool of water is formed, it will be more like the "shallow pool garden."
OTHER BENEFITS OF ABOVE-GROUND GARDENING TECHNIQUES. Protection from animals and floods. There are substantial areas along the Amazon in Brazil where all gardening is done in shallow beds on platforms. Local people have differing explanations for why this is done. This has an obvious advantage in flood-prone areas where even houses are sometimes built on stilts. But platform gardens are the primary gardening method even where it never floods. Wayne Smith reports that people in his area plant gardens on platforms to avoid damage by animals. "They make a platform of sticks, an old canoe etc. from 4-7 feet tall, place a layer of dirt and ashes/cinders on top, and then grow mainly green onions." (We have also heard that some farmers of Mayan descent in southern Mexico use the same technique.) Soils in some regions of the Amazon basin are highly acidic and contain so much aluminum that it is toxic to many vegetables. The improved growing medium that is concentrated on the platforms may give much better results in such situations.
Gardens for the handicapped. Shallow beds on platforms (that can be inexpensive because the gardens weigh so little) make gardening available to people with physical handicaps that prevent them from working in the soil. If platforms are placed at the right height, people in wheelchairs can garden easily.
Avoidance of soil diseases and pests. Root-knot nematodes are such a problem in our soils in Florida that susceptible plants cannot be grown unless the soil is sterilized. However, some fungi that live on decaying organic material kill nematodes. If we have enough organic matter in the soil we can sometimes get around the nematode problem. If we have 100% organic matter (as in a shallow bed and wick gardens) or no soil (as in the wick gardens), we have no root-knot nematodes. (After a few growing seasons, the decay process is essentially over. At this point the nematode-killing fungi may no longer be present and nematodes can again become a problem, unless the bed is renovated with fresh organic matter.)
Situations where there is a serious problem with the soil may lend themselves to above-ground gardening even in rural areas. One season we planted a few rows of green beans in the soil and, right beside them, a few more rows in a shallow bed garden. This bed was made of grass clippings just as though it were on a cement slab, except that it was in direct contact with the soil. Roots of beans from the grass clippings were totally nematode free; roots in the soil were covered with knots. Often at ECHO nematodes kill sugar snap peas before they bear, except when planted in a shallow bed of grass clippings on top of the soil.
Ability to garden in the shade of trees. Many heat-sensitive plants thrive better in some shade in the hot tropics. Above-ground techniques can be used to make beds on a sheet of plastic under trees. Tree roots are not damaged by tillage; the plastic prevents them from interfering with the vegetables; and many plants benefit from light shade. Tire gardens can be placed anywhere that provides enough light, even directly on protruding tree roots.
LIMITING FACTORS IN ABOVE-GROUND GARDENING. It is not difficult to list possible problems with above-ground gardens. The poor may live in homes with rooftops that cannot even bear the weight of a person. Those with the most substantial rooftops may have the least incentive to garden on them. Fertilizers may not be available, especially those with micronutrients. People may not be prepared to give daily care to a garden. It may be difficult to develop a uniform formula for making the gardens when only recycled materials are considered. Water may be scarce and have to be purchased. Compost is usually not available unless people make their own, and motivation to do this may be lacking. Urban gardening projects in general have a reputation of little payoff among many in the development community.
There are situations where any of these problems may be critical. However, the world is a very, very large place. A creative perspective and innovative attitude is necessary to see successful above-ground projects develop. An idea that, if successful, promises to make acres of prime, presently unused, arable "land" suddenly available for producing food and some income, is deserving of special effort. We can begin with those thousands of situations where the above problems are not limiting-while we consider how to include more people.
It is imperative that your first community project succeed. Do not involve many people in above-ground gardening until you are sure you know what will work and have done it for at least one season. The success of the first community project is more important than saving on every possible ingredient. I think particularly of fertilizers. In every conversation it inevitably comes up, "Why not use manure tea instead of fertilizer?" It is possible, but it is not foolproof. (See discussion of this topic below under "Constructing the shallow bed.") It is almost certain that some gardeners will fail not because the methods themselves have a problem but because of inadequate concentration of nutrients in the manure tea. It is quite possibly cheaper (and certainly less offensive to the neighborhood) to use fertilizer than to haul in manure from the countryside. But more importantly, if it fails you will probably not get a second chance with the people who tried your "far out" idea of above-ground gardening.
Also, as with any new enterprise, consider the market before promising people that they can make money on their gardens. A Colombian organization developed a shallow bed/hydroponic system with many similarities to what we discuss in this chapter. The project used donated rubbish-rice bran from a mill and wooden crates from an auto parts shop-and recycled polythene from commercial flower farms. It cost families less than $5 to set up one square meter plot and under $9 per year to operate it, using commercial hydroponic fertilizer. In addition to what the 130 participating families used themselves, the cooperative sold over three tons of vegetables each month. A major supermarket chain bought produce from the community. Once a week produce was brought in, weighed, and paid for on the spot. From the sale of vegetables grown on the roof, the organization could pay the rent on their center. This enterprise was highly publicized, and apparently very successful for many years. ECHO was never able to make contact with the project directors. We heard that the project ended once the funding stopped, due to difficulty in obtaining the hydroponic nutrients. While it was operating, the key ingredient was that when each garden was planted, the market for its produce was guaranteed. It may be unrealistic for an informal group of gardeners to provide the quality control and regular supply required by a supermarket contract. Marketing is crucial, but to be sustainable it may need to be limited to individuals selling through established local channels.
WHERE ARE THESE ABOVE-GROUND METHODS BEING USED TODAY? There are examples of urban gardening and above-ground gardening to be found on some scale in most cities (see review of Urban Agriculture at the end of this chapter). There is a section on ECHO's home page for updates on above-ground gardening projects in process. Send us information on what you are doing so it can be included.
a roof garden
ECHO and several people in our network have been involved in projects for a number of years. A group called "Haiti Gardens" is very active in and around Port-au-Prince. ECHO staff member Dan Sonke visited some of those gardens in March 1996. We can send a copy of his trip report to interested visitors. They are using traditional methods on vacant land and also tire gardens both on rooftops and at ground level. The Christian Reformed World Relief Committee is in the beginning stages in 1996 of evaluating tire gardens for diverse settings in San Salvador, El Salvador.
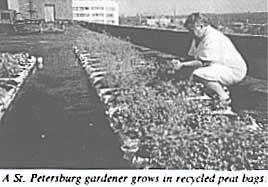
ECHO and the Center for Citizen Initiatives have together sponsored a rooftop gardening program in St. Petersburg, Russia. The combination of a population that loves gardening, a shortage of food, and an exceptionally high educational level makes this an ideal location. Nearly every citizen lives and works in buildings with huge flat cement rooftops. The main problem is in getting official permission to use the roofs. Institutions can more easily establish rooftop gardens than can individuals because the director of the institution that decides to establish the garden also controls the roof. There are now about 20 rooftop gardens in St. Petersburg. One garden on an apartment building has become a mini-farm, producing onions, herbs, and growing some container berry plants for resale. In 1995 a large garden was planted on the roof of the main prison in St. Petersburg. In 1996 a garden on an orphanage rooftop is beginning in Moscow.
"WHAT ABOUT HYDROPONICS?" AND NON-RECIRCULATING HYDROPONICS. People often get excited about hydroponics for third world situations. I have never been among them. Hydroponic systems tend to be expensive, require energy and equipment for circulation of the water to get oxygen and nutrients to the roots, and demand close monitoring of nutrient concentrations. Its value is in situations where expense of production and price of product are very high, e.g. growing winter greenhouse tomatoes near a large northern city. The 3- or 4-fold yield increases from high-technology hydroponics may pay in such situations. I am unaware of many third world situations in that category, especially which would involve peasant farmers. Also, if a pump breaks down where parts are unavailable or the power goes off, the entire planting can be lost. Dr. Hideo Imai at the Asian Vegetable Research and Development Center in Taiwan sent us a description of a non-recirculating hydroponics system he developed (an abbreviated version was published in HortScience, vol 23, 906-907 (1988)). This system gets around these problems to a considerable degree. His discussion of air and water-nutrient roots is also helpful in understanding plant growth where there is at times a high water table. The following is abstracted from his reports.
Plant roots require oxygen, but I had not realized until Dr. Imai's paper that not all portions of a plant's roots require the same amount of oxygen. Plants can form what he calls oxygen (O) roots and water/nutrient (W/N) roots. Roots exposed to air specialize in taking up oxygen; those immersed in water specialize in taking up water and nutrients.
smaller adaptation of his
non-recirculating hydroponic system
This figure (from Dr. Imai) shows a schematic of a smaller adaptation of his non-recirculating hydroponic system. In the commercial unit, plants are suspended in holes cut in a lid that covers a 0.5 meter deep trough. The roots extend through the air, spread out onto a net, and then pass into water a few centimeters below the net. The purpose of the net is to provide support for extra O roots, which spread out over the screen. A smaller number of W/N roots drop on down into the water, but no further than 15 cm due to the limited amount of dissolved oxygen.
When the water level drops, the W/N roots change into O roots, a process taking only 2-4 days. However, this is not reversible. If solution is returned to the original depth the plants wilt within a few hours and do not recover. I can confirm this personally. When my interns left for the holidays it fell to me to maintain our first unit. I was surprised at how many gallons it took to get the water back to where I mistakenly thought it had been maintained. Water now covered roots that had been transformed into air roots. By the next evening the plants looked almost like they had been through a frost, and they did not recover.
ECHO did some interesting trials with the non-recirculating concept at the Caribbean Marine Research Center in the Bahamas. We thought the concept had potential for islands with only rock for soil. They had an unused commercial hydroponic unit in a greenhouse. We disconnected the pumps and grew very acceptable tomatoes, cucumbers and peppers with non-recirculating nutrient solution in each trough.
I am not recommending this system for most situations. After many trials we consider it too expensive, too heavy for a rooftop, a serious breeding ground for mosquitoes, and too temperamental for mass use. We did learn from it some important things about how plants grow, and it also influenced the development of the other systems we recommend. The shallow pool garden, for example, allows space for the O roots throughout the growing media and the W/N roots in the pool of water. However, the shallow pool is an improvement over the hydroponic system described above in that the depth of the pool, formed by placing sticks under the edges of the plastic, is constant. Overwatering as I mistakenly did in the system above would not kill the plant in the shallow pool, as the extra water would simply overflow the pool, leaving the O roots intact in the growing medium above the pool.
If you are interested in pursuing this approach further, Dr. Bernard A. Kratky at the University of Hawaii (461 W. Lanikaula, Hilo, HI 96720, USA) has done considerable research over many years and can provide you with technical details. He produced a 38-minute video demonstrating three non-circulating hydroponic methods (US$29 in USA; $35 overseas postpaid) and a new book (39 pages, 10 illustrations; $8.95 plus postage), both titled Non- Circulating Hydroponic Methods. Order the video from UHH College of Agriculture, 200 W. Kawili St., Hilo, HI 96720, USA. The book is sold by DPL Hawaii, 39 W. Lanikaula, Hilo, HI 96720; phone 808/935-8785.
THE SHALLOW BED GARDEN has the most in common with ordinary gardening techniques. If you have enough compost or quality potting soil to make a 3"-deep bed, this technique is straightforward and most of the following discussion would not be needed. The main difference from regular raised bed gardening is that it must be watered at least daily. It does not use more water, but it must be watered more frequently.
Shape of the Shallow Bed Garden. Like most people, when I first began thinking of gardening on rooftops I envisioned gardening in rather deep containers. Container gardens, however, can be heavy and moderately expensive. If they are too small, larger vegetable plants may grow but give little produce.
Our first model garden consisted of a three foot deep bed of wood chips. (Wood chips are much lighter than soil.) We got the idea from local nurseries. They sell to apartment dwellers half-bushel bean hampers filled with wood chips and each containing a single tomato plant to be grown on their balcony. Gardeners are instructed to pour water containing a soluble fertilizer over the plant each day. The hampers work well and the taste of the tomatoes is exceptional.
Our deep garden used large amounts of fertilizer. A very important point to remember in working with organic matter that has not yet decomposed is that the microorganisms that cause organic matter to decay use the same fertilizer elements as do plants. This becomes a special problem if, as is the case with wood chips, the material itself is low in nutrients. The decay process can use up the nutrients, leaving the plants anemic. (These nutrients are not permanently lost. They will become available months later when the bed has been transformed into compost.) Some plants thrived, others always showed nutrient deficiencies.
After several trials, we discovered that beds only 3 inches deep were not only lighter in weight but gave better results. After several years of growing in shallow beds, I would now describe the ideal rooftop garden as being at least 3 feet (1 meter) wide and only a few inches deep.
The ability of vegetables to grow in shallow beds should not have surprised us. Greenhouse tomatoes, lettuce and cucumbers are often grown hydroponically in long rectangular bags 6-12 inches wide and a couple inches high that are filled with planting mix. Plants thrive even with such a small root volume because just the right amount of water containing a soluble fertilizer is continually dripped into the medium.
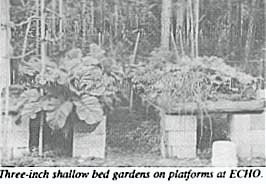
shallow bed gardens on platforms
Roots do not require much volume when there is plenty of water and nutrients. Why do roots normally cover a much larger volume? When watering is sporadic a large volume of soil (with roots throughout) is required to hold enough water to keep the plant supplied between waterings. The primary question about how thick the shallow bed must be comes down to this: How often are you prepared to water?
Often people wrongly assume that only shallow-rooted plants will thrive in a shallow bed. Except for tubers where the edible part exceeds the size of the bed, we have not found this to be true. Although a shallow-rooted plant cannot take advantage of a deep bed (its roots will not reach to the bottom), a deep-rooted plant can adapt to take advantage of the space in a wide but shallow container, as this carrot has done.
The question of weight. We place great emphasis on developing very light-weight beds for rooftop applications. That is why we use no soil and we like to keep the depth to only 3 inches. Individual soil particles typically weigh approximately 2.75 times as much as an equal volume of water. There are spaces between the tiny soil particles, however, which can account for up to 50% of the volume of a good garden soil. It is the worst case (heaviest soil) that concerns us in considering any possible danger to the roof, so we will consider the weight after a drenching rain and assume that every space is filled with water. Such saturated soil weighs 1.9 times as much as an equal volume of water. Individual particles of organic matter typically weigh slightly more than water (1.1 to 1.4 times) and the spaces between them are much more than 50% of volume. So in a worse case, i.e. a totally flooded bed of fully decayed, compact organic matter, the weight would be at most 1.2 times that of water. In most cases, the weight will be almost the same as an equal volume of water.
The weight can still be considerable. This table compares the weight of 3" (7.6 cm) and 8" (20.3 cm) deep beds that are 4 feet wide and 8 feet long (1.22 m x 2.44 m), one with soil and one with well decomposed organic matter, both fully saturated with water.
Maximum weights of four rooftop gardens.
|
Depth |
Weight | |
| |
well-decomposed organic matter |
good garden soil |
|
3" |
598 lbs (272 kg) |
947 lbs (430 kg) |
|
8" |
1,595 lbs (725 kg) |
2,552 lbs (1,147 kg) |
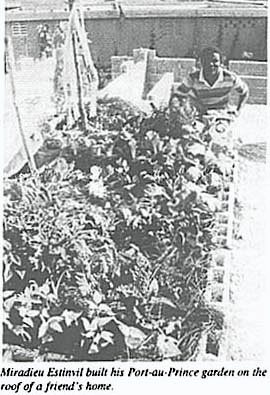
building a garden on a friend's
home roof
At ECHO we usually have no sides to the gardens in order to keep material cost to a minimum. If cement block sides were used, the weight and cost would be considerably greater. Based on what we have seen, we have been more cautious than necessary. As you can see in the pictures, some gardeners in Haiti are using concrete blocks for sides and depths equal to the 8 inches of the blocks. No problems have been reported although I saw perhaps half a dozen gardens. If there is any doubt about safety, remember to put the heaviest items (like a barrel of water) directly over walls.
Materials for the Shallow Bed Garden. No material will serve better for making a shallow bed than fresh compost-if you have it. Most of this discussion becomes necessary only if the people with whom you intend to work do not have affordable access to quality compost or potting mixes. In that case, because the mix of free materials is always different from one city to another, it may be necessary to do your own trials for a season or two and do some problem solving. The end goal is to have a foolproof, low-cost gardening system tailor-made for your situation.
A garden can be planted in fresh organic material if one does not have compost. Since the inexpensive raw materials available for making the garden differ from place to place, the techniques used may need to be varied, depending upon what materials are used. The choice depends mostly on what is being thrown away in the area. We have used wood chips because they are free from the electric company after they trim along the electric lines. Our favorite material is grass clippings. Contractors who mow lawns for homeowners would much rather give ECHO their load of grass clippings than pay the county landfill to take them. Barbara Daniels in California, who developed a similar method of above-ground gardening, prefers a mixture of tree leaves. Perhaps the best results may come from a mixture of materials, which can include weeds.
Waste materials in the developing world will likely be different but equally useful. Perhaps bagasse (i.e. sugar cane waste), rice hulls, coconut husks, weeds, leaves or even manure are available in your community. In Haiti, the fine particles left in bags of charcoal are being incorporated into the mix. (Sawdust is available in places, but would be my last choice. It will use up fertilizer even faster than wood chips, because of the greater surface area, and it easily becomes waterlogged.) No matter what organic material you use, after one or two growing seasons it will have decomposed into a beautiful compost.
The beds do not need to contain organic matter as long as the material is fine enough to hold sufficient water. For example, gravel has been used in various hydroponic systems for years. Non-organic media have an initial advantage in that the lack of decomposition means that only the plants, not the decaying bed, are using up your fertilizer, but in the long run non-organic beds are more fickle. A sudden imbalance in nutrients or swing in pH (acidity or alkalinity) can more easily develop. Organic matter, even if only partially decayed, acts as a buffer to prevent extremes. This happens because after a few weeks nutrients begin to be released from the decaying material. If the plants need more of a particular nutrient than your solution is supplying, the bed itself provides a certain amount of it. Conversely, organic material is able to absorb, for later release, some of the excess nutrient you might add. It also resists changes in pH.
As we considered various recyclable materials, shredded tires came to mind. Recycled rubber seemed to offer an inexpensive addition to the growing medium and its use would solve an environmental problem at the same time. After several trials we have failed to get good growth with this product. It is just as well. The August 1994 HortIdeas cited research which found that chrysanthemums grown in soil mixes with even small proportions of shredded tires did not fare as well as plants in rubber-free media. The plants grown in rubber had zinc levels 74 times higher than normal, which could lead to toxicity levels for some species. For now it may be best to avoid using tires in your soil mix. (We have had no such problems growing plants in our tire containers, however. Nor would we expect it, as the surface area with which roots are in direct contact with rubber in shredded tire mixes is thousands of times greater than the minimal contact with a tire wall.)
Experiment with mixtures. When possible, if compost is not available, we like to use a mixture of materials. Mixtures are especially good because you have more flexibility to create the kind of environment that roots like. It is also likely that if a needed nutrient is not released as one component begins to decay, it will be by another. You can include many common garbage items. One of our more interesting beds is made of approximately 40% by volume cola cans (with slits cut into the sides so roots can enter that well-aerated interior). The other 60% is grass clippings mixed between and placed on top of the cans. The advantages are that it provides good aeration and a deep bed with exceptionally low weight. Ordinary garden fertilizers are added when necessary.
A 2-5 inch layer of weeds packed closely together and covered with perhaps a couple inches of grass clippings or (better) compost from a previous bed works well. The 6-8 inch deep bed for corn was made in this way. A benefit to placing weeds on the bottom (rather than grass clippings, for example) is that there are more air spaces between the weeds, which is better for roots.
Once you have settled on the materials for garden construction, the available fertilizers, and the vegetables to be grown, you will be able to develop straightforward, detailed instructions for your unique system of shallow bed gardening. That is what you will pass on to new gardeners in your community.
Constructing the Shallow Bed. An important factor that makes these beds inexpensive is that no container is necessary. Depending on the material used, sides may not even be needed, especially if a mulch is placed on top of the bed. We only use sides for platform gardens or where appearance is important. We have had a lot of heavy rains and strong winds over the years. The only bed that gave us a serious erosion problem was one in which we used a large amount of silt from the bottom of a fish pond.
The shape of shallow beds is determined by the same considerations that one uses in making raised beds. They can be of any length, but a break for a path every 8-12 feet is helpful. They should be just wide enough (4-5 feet) that a person can reach to the middle of the bed. Thought should also be given to maximum use of space. A path down the length of the rooftop with beds and aisles going off to either side is probably the most efficient.
If a sheet of plastic is available, we like to use it for a base. If the garden is on a rooftop we believe it may minimize discoloration of the roof and slow any possible seepage into cracks that might exist. No doubt it will always be moist under the plastic, but that is less of a worry than a considerable supply of water in direct contact with the roof. If the garden is on top of ground in a situation where there is some problem, it keeps the growing medium and roots completely isolated from the soil.
Let us use grass clippings as an example. We leave the grass clippings in large piles until needed. It is best to let them decompose in a pile for at least a few weeks because the high temperatures in the piles allow much of the composting process to take place there rather than in our garden. Also we believe (no data) that most pesticides that might have been on or in the grass clippings are destroyed during this time as well. If the pile of grass clippings is not too old, the contents will be fluffy and moldy. (Be careful breathing the dust. I have developed quite an allergy to it, though no other staff are affected.) Start with a pile high enough to allow for shrinkage during the initial preparation and continuing as the bed decays.
Thoroughly wet the pile. Often the clippings do not want to absorb water-even after adding a lot of water, the clippings half an inch deep may be dry. When this happens, add a few tablespoons of laundry detergent (any variety) to the watering can and pour evenly over the surface. Detergents fall under a class of compounds known scientifically as wetting agents or surfactants (surface-active-agents). They help water adhere to surfaces. While adding water, if the clippings are fluffy, walk over the bed and stomp down the grass as much as possible. If the bed is made of other materials that do not need to be compressed, such as wood chips, rice hulls, or dense clumps of grass clippings that have spent several months in a pile, the materials are simply placed in the bed, wet down with detergent solution, and fertilized. This will help keep the materials constantly moist, and so hasten decay.
Whenever possible, cover new beds with an inch or more of compost before fertilizing and planting. Remember that compost is the ideal medium. The shallow layer of compost is a perfect place for a seedling to begin its life. We are using these other materials only because we lack enough compost.
Finally we add an ordinary garden fertilizer and dolomitic limestone. If it is 10/10/10 fertilizer, we add 5 pounds per 100 square feet. (The numbers refer to the percent of nitrogen, phosphorous and potassium, respectively.) If it is 5/5/5, we add twice that amount, etc. Neither the exact numbers nor the exact amounts are that important. There are many other fertilizer formulations on the market. You might only be able to get something like 8/6/10, for example. Don't worry about it. Just avoid extremes like 36/10/10 used for lawns or something like 10/0/10 which would be a special purpose formulation completely lacking in phosphorous.
We always use fertilizer with micronutrients (that is elements needed only in minor amounts). If you cannot find that kind of fertilizer, the micronutrients that will soon be released by the decaying organic material may be sufficient. One can often buy micronutrient formulations separately and inexpensively. These would be used in small amounts, following directions for a regular garden. Added micronutrients are a must with any system that is not based on organic matter. (A quick way of providing these micronutrients, if they are not contained in the fertilizer, is to apply some manure or to water the garden with a manure tea made by soaking a bag of manure in a barrel of water for a few weeks.)
If you cannot find dolomitic limestone (dolomite), I doubt if it will matter too much as long as some of the organic matter has begun to decay. Go ahead and add regular limestone instead. The main function of the dolomite is not to control acidity (this has never been a problem for us) but as a source of the two minor nutrients: calcium and magnesium. (Ordinary limestone adds calcium, dolomite adds both calcium and magnesium.) A commonly available alternative source for concentrated magnesium is epsom salts.
Whether you use fertilizer or manure and manure tea depends on your location (and philosophy). In many urban situations it is easier to obtain fertilizer than manure. Remember that your goal is to have a foolproof system that can be taught to and duplicated by dozens of gardeners. You can develop very precise instructions for a system designed to use a particular commercial fertilizer, but it will be much more difficult with manure tea. The response of plants to manure depends upon the age of the manure, the animal's diet, how much bedding is included in the manure, and on the kind of animal. (Goat manure is reportedly one of the best manures for hydroponic systems. This may be because goats are browsers, eating a little from many kinds of plants each day. Consequently their manure has a composite of nutrients found in a wide variety of plants.) Do not just assume that people cannot afford fertilizers, especially if the produce is to be sold.
Jeff McManus uses water hyacinth for above-ground gardening in Bangladesh. Water hyacinth (Eichhornia crassipes) is one of the most prolific plants on earth. This floating weed chokes waterways around the world. People in Bangladesh clear their ponds and rivers of the floating plants and pile them on the banks. They plant vegetables in the water hyacinth, and these mounds become "floating gardens" in the monsoon season. The McManus family grows lettuce, papayas, tomatoes, and very productive roses in boxes filled with water hyacinth harvested from nearby nutrient-rich waters. They chop the plants into small pieces, let them compost for two weeks with daily turning, and plant directly in the compost. Jeff mixes the compost with a little manure and some wood shavings, but does not add extra fertilizer, since the water hyacinth is an efficient collector of nutrients. The spongy plants hold a lot of water, so very little watering is needed. The box gardens work best with fresh material; reused compost seems to promote diseases in the plants.
Planting in the new bed. Planting seeds or transplants into shallow bed gardens made of compost is done as in any other garden. Planting directly into beds of organic material that has not yet decomposed requires some special techniques. Larger seeds like peas or beans can usually be planted directly if the medium is made of a material that packs closely enough together to remain moist most of the day and make close contact with the seed to keep it wet. Seeds must be deep enough into the medium to remain moist but shallow enough to be able to grow to the surface after germination. (The top inch or so of many materials, e. g. nearly fresh grass clippings, tend to dry out.) You may need to water a few times each day until they germinate. We have also had the opposite problem with older, matted grass clippings which stayed too wet.
Smaller seeds, like carrots, require compost or soil or something of very similar texture to get started. If you cannot cover the entire bed, just form a 1-2 inch deep trench in the packed down grass clippings, fill it with compost or soil, and plant in this trench. Even this small amount of compost will provide an environment for the seed and initial roots that is just like they would experience in any garden. A useful technique for germinating carrots, even in a regular garden, is to place a board on top of the row. This ensures that the top cm of the soil remains moist. Look under it daily until you see the first seeds germinating, then remove it.
Transplanting likewise can demand special care if the medium is not similar in texture to soil. We often make a small hole, insert the transplant, and fill in around it with several handfuls of compost or soil.
Keep a close watch on the appearance of the vegetables. At the first sign of nutrient deficiency, add a bit more fertilizer. With high-nitrogen materials like grass clippings, this may only need to be done once or twice, or not at all. With low nitrogen materials like wood chips it will be necessary to add fertilizer frequently. A small amount of solid fertilizer can be sprinkled around the plants, taking care not to get it in direct contact with leaves or stems. Our best wood chip gardens were grown by watering every other day with a solution of soluble fertilizer or manure tea. Most soluble fertilizers are made to pour directly on the leaves (some nutrients can be absorbed through the leaves of some plants). This is especially helpful if a deficiency has already appeared. If possible have a spray bottle on hand filled with a soluble fertilizer. Use it as "medicine" to spray plants when any deficiency appears.
Refurbishing the Shallow Bed-Subsequent Seasons. You may be surprised at two things: (1) how quickly the depth of the bed drops as the material turns to compost and (2) how quickly a beautiful compost is formed. Because there is no soil in the beds, the material turns deep black and may eventually look like peat. The bed must be refurbished after harvest whenever it has shrunk to less than the desired depth or has become so dense that it holds too much water. Alternatively, the bed can be recycled: dismantled and the compost which has formed in it used as the top layer in constructing new beds.
If the bed is still deep enough for another growing season, all that may be necessary is to apply fertilizer. The bed should not need as much fertilizer as when it was new. Much of the bed, depending on its original composition, has now been converted to compost. This is not a delicate system, like hydroponics, with exacting fertilizer requirements. I trust that any frustration at not finding rigorous details on the amount of fertilizer will be more than compensated by having a bed that allows some flexibility. More fertilizer will be needed if you have heavy rains that leach away nutrients. WATCH YOUR PLANTS FOR CLUES ON WHAT THEY NEED.
The task of refurbishing is much easier than making the original bed, because we are now starting with a considerable amount of compost. Rather than layering new organic material (e.g. grass clippings) on top of the bed, it is best to remove the composted material, layer the new material onto the empty bed, then place the remains of the old bed back on top. We add some fertilizer (less than with a totally new bed) and water.
There are two reasons to refurbish in this way. First, the older material can become so dense that, if left at the bottom of the bed, aeration might be poor. This is not a problem when it is placed on top of the less compact fresh organic material. Second, it is much easier to plant into the composted material than it would be into the fresh material.
What plants will grow in a shallow bed? We have had success with a wide variety of vegetables: amaranth, broccoli, cabbage, cow peas, corn, eggplant, cucumber, green beans, herbs (rosemary, tarragon, basil, sage, mints, chives), kale, kohlrabi, lettuce, okra, onions, quail grass, radishes, sugar snap peas, tomatoes, winged beans and a variety of flowers. It is easier to say what crops may give problems. We stay away from large vines, such as tropical pumpkins, jicama or sweet potatoes, that have such a large leaf area that they quickly deplete the reserve of water in the shallow bed. The shallow pool method described below may be better for these large plants; however, with sufficient volume (either a deeper bed or fewer plants in a bed) or more frequent watering, there should be no problem growing vines such as pumpkin or watermelon, letting them flow over the side of the building or over rocky soil. Root crops require deeper beds. We have grown acceptable carrots in grass clippings, but had to make the bed about 8 inches deep. It shrank so much during the growing season that the carrots stuck out of the top by an inch and had L-shaped roots because the bed was too shallow. Carrots grown in wood chips were distorted because of the twists and turns the taproot made to avoid wood chips.
The Shallow Bed garden is the most foolproof. Especially when made of compost, it differs little from gardening in the soil. The main differences are its need for daily watering and the shallow roots (to which plants show a surprising ability to adapt). The ability to grow vegetables in fresh organic material while it is being turned to compost is a very attractive feature.
SHALLOW POOL GARDENS. Daily watering required by shallow bed gardens can be a problem. Pat Lahr, a missionary in Haiti, developed an ingenious system using a 5-gallon bucket to provide continuous water to the bed.
Pat used a principle that farmers have used for decades to automatically water animals. A 3/8" hole is drilled in the lid (one inch from the edge) of a 5-gallon bucket. The bucket, optionally filled with nutrient solution (manure tea or water containing a complete hydroponic fertilizer), is placed upside down in the pool. The side of the lid nearest the hole is placed on a stick just thick enough to provide the desired depth of water. Water flows from the bucket until the pool of water rises to the point that air can no longer get under the lid and into the bucket. This ensures a continual, shallow pool of water. When the pool level drops enough to allow a few bubbles of air into the bucket, more water flows into the pool.
In our first trial with the system, we used only a 6" layer of pine needles and hydroponic solution to grow an okra plant in a 4 ft square shallow pool garden. It fell over when it was two feet tall, but shoots grew rapidly from several points along the stem. These new shoots, supported by the portion of stem on the ground and the now substantially larger root mass, did not fall over and grew into an exceptionally large, bushy and productive okra plant. Incredibly, we found that the leaves transpired 5 gallons of water on a hot summer day. Results are more reliable the closer you come to a normal garden. Today our shallow pool gardens are basically shallow bed gardens sitting in the pool and extending at least 2-3 inches above the maximum water level.
The roots of most food plants and flowers require plenty of air to thrive. You may have heard that "more houseplants are killed by overwatering than by underwatering." The problem with overwatering is not that the roots do not like to stay moist, but that if heavily watered, water fills most of the spaces ordinarily filled by air in dry soil. Likewise, if you filled the shallow pool with heavy clay, it might remain so moist that few plants would grow for lack of air. (We have nothing but sand here in Florida, so have never been able to try a clay soil.) Now the concept of air roots and water/nutrient roots in the earlier discussion on non-recirculating hydroponics becomes important. We want to design a medium that will encourage the growth of both.
There is an element of artistry involved in creating the medium. You need to create a medium with such large air spaces that no matter how much water is around, the roots will still find plenty of air, but dense enough that water in the pool can move up by capillary action and keep the medium moist. One way to achieve good aeration in the States is to include perlite in the medium. Perlite is a special inorganic material sold to make potting mixes very airy. One formula we frequently use is "Cornell mix." The Cornell mix contains 1/3 perlite, 1/3 peat moss and 1/3 vermiculite. In third world settings perlite is too expensive to consider. There are several alternatives.
If you have compost or any mix that has a lot of small air spaces, it may work well with most plants. A good way to create air spaces is to incorporate small particles of either organic or inorganic material. We have found that it works well to have a bottom layer of inorganic material (that will not decay) in the pool itself (sand, small gravel, small pieces of lightweight volcanic rock, cola cans with slits cut in the sides to allow roots to get inside) then to cover this with small pieces of fresh organic matter (pieces of coconut husk, corn cobs, rice hulls, weeds, wood chips). Finally we place a layer of compost on top. In such a mix, roots will always be able to find air even right at water level.
There is one other step in the above description that will improve performance. We have found that all these large air spaces can be so effective that there may be no connection left to pull water by capillary action up to the top of the bed. The result is that until new plants develop roots deep enough to reach the water and form water/nutrient roots, the beds must be hand-watered from above. This can be solved by including spaces where "columns" of compost extend clear into the base of the pool. Newly planted beds should probably still be supplemented with hand-watering until seedlings have a good start.
Why do we recommend using inorganic material in the pool itself? In our first version we did use all organic materials. The bed of pole beans did quite well-until the bottom material rotted and the level of the bed dropped. When this happened, many of the air roots ended up in standing water. As discussed above, this is harmful (even fatal) for the plant. With decay-resistant materials like cans or coconut husk pieces extending above the water level, the bed can never sink into the pool.
"Appropriate technology" refers to technologies which are sustainable and affordable in your situation. The following two examples are given to encourage you to look for what might be available locally. An "appropriate technology" shallow pool garden in Florida can be made from the inexpensive plastic wading pools sold for children. Make drainage holes three inches up the sides. After a coat of redwood paint, they make attractive, circular raised bed gardens instantly. Place an empty one-gallon flower pot in the center on the bottom of the pool as a "monitoring well": a quick glance allows us to monitor the water level and judge when to add more. (Formerly we used a depth of one inch, but less frequent watering is needed with the deeper reservoir. Tree roots also managed to find the lower drainage holes and end up growing in the garden itself!) A ground-level shallow pool garden could be constructed with a rim of rocks, or even soil, covered with a sheet of plastic. If elevated, wooden boxes lined with plastic can be used. To keep costs to a minimum, the tire gardens constructed to retain a pool of water would seem to be the most durable and inexpensive.
A variation of this technique, "appropriate" to Florida, that visitors find especially attractive, is what we call "eave trough gardens." The ends of an eave trough (normally used to divert water as it runs off of a roof) are bent upward so it holds about a 1" pool of water. The trough is then filled with medium as in the shallow pool garden. Instead of a bucket one can use inverted glass or plastic bottles to extend the time between watering. This technique is useful only for small plants (unless a trellis and very frequent watering are used). Leaf lettuce, onions and kohlrabi do quite well, as does the flower called "impatiens."
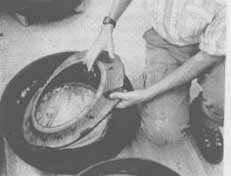
In the Shallow Pool garden, the volume available for air roots seems to be a limiting factor for larger plants. Most larger vegetables only produce well with at least 3 inches of soil above the water level. (Okra is an exception. It seems to be very adaptable to and forgiving of any of these systems, even suspended just above the water in a pile of pine needles! When we finally pulled out the single okra plant in a 4 ft2 shallow pool we found a dense 1" thick mat of roots. See the picture two pages back.)
WICK GARDENS. Similar principles are involved in another innovation of the Lahrs in Haiti. Pieces of polyester cloth are laid out to the dimensions of the desired bed. Seedlings are transplanted into a deep bed of an airy material such as pine needles, as was done in the shallow pool system. The bottom of each root ball must touch the cloth. The 5-gallon bucket is placed upside-down (no stick to raise one side of the bucket this time) on a piece of cloth extending from the side of the garden. I am not sure how air gets into the bucket. Apparently a seal develops between the lid and cloth and the space between them is filled with solution which "wicks" out and keeps the entire cloth-covered area drenched in nutrient solution.
watering shallow pool gardens
Polyester cloth is chosen rather than a natural fabric because it is slower to decompose. Natural materials such as wool or cotton are composed of building blocks common to many living organisms (amino acids or glucose respectively) and are readily attacked by a variety of microorganisms.
The cloth moves water within your bed as surely as a pipe might carry water to a garden. Just as you would chose a pipe that was large enough for the job, you should use the thickest cloth you can find. A very thin cloth that we used failed to transport enough water. Alternatively you can use more than one layer of cloth. After harvest you will find that there are two thin mats of roots, one covering the top surface of the cloth and one between the cloth and the cement.
The portion of rooftop used for a wick garden must be very nearly flat. If the slope is great enough to cause water to flow, it will continue flowing right off the edge of the cloth. If the slope is just a little too steep for either the wick or shallow pool techniques, we have had success by using a combination of the two. We made a cement rim along the lower edges of the garden only, then covered the entire area to be gardened with a cloth. Where the pool stops the water continues up grade to the rest of the garden because of wicking action. The bucket must be positioned at some point lower than the top edge of the rim, or the pool will overflow.
Capillary mats are sold through greenhouse supply catalogs. Commercial growers of bedding plants place the mat on a flat surface, keep it moistened with nutrient solution, and place pots with cuttings or seeds directly on the mat. (We purchased some of the material and compared it to polyester cloth; we noticed no difference).
It is difficult to imagine a garden that is lighter in weight than a wick garden. When a shallow bed or shallow pool garden has been newly constructed out of undecayed organic matter, it is sometimes tricky to add just the right amount of fertilizer to provide for the needs of both the plants and the microorganisms that are turning the bed into compost. This is not a problem with the wick systems (the rate of decay of the fluffy pile of pine needles is not rapid enough to be much of a factor).
The most serious disadvantage is that the wick method is almost strictly a low-technology hydroponic system. As such, very complete hydroponic fertilizers must be used. This means that not only must the major nutrients (nitrogen, phosphorous and potassium) be supplied in the nutrient solution, but the two minor nutrients (calcium and magnesium) and important micronutrients (iron, manganese, zinc, boron, copper and molybdenum) as well. Other elements may be important to plants but are probably present in sufficiently high concentrations that they do not need to be added.
In some situations community development projects can readily obtain hydroponic fertilizers or the ingredients to mix their own. Making your own is technically not difficult, but could not be done by the average gardener. A little hydroponic fertilizer goes a long way because, unlike field fertilizers, less inert fill is used in making soluble fertilizers. It is not unreasonable to import such fertilizers yourself as long as the project makes economic sense and a steady supply is assured.
Gardeners will fail if at any time an incomplete fertilizer is used in a system containing no or little organic matter. Let me share an example of our own. At one point we switched from a fertilizer shipped 2,000 miles by a hydroponics supply company to a fertilizer that could be purchased locally. The description led us to think it contained everything needed to maintain a soilless mix. The plants started out exceptionally well, then began wilting, leaves became discolored, roots failed to develop and many died. It turns out that the fertilizer contained every nutrient EXCEPT magnesium. The manufacturer apparently assumed that magnesium would have already been added to any soilless mix and that the fertilizer could "maintain" the mix without containing magnesium.
The precise demands placed on the fertilizers can be reduced by placing a very shallow layer of compost or potting mix on top of the wick. We have grown very nice lettuce, radishes and green onions using no more than an inch of such medium. The plants can obtain almost any micronutrient they need from the compost. It also provides extra space for root growth and gives a bit more support to the plants.
During the rainy season, the wick method works better with something like pine needles that retains almost no moisture rather than dense materials like grass clippings. Peppers planted on a wick covered with 2" of packed grass clippings grew three times as fast near the bucket as those a foot farther away. We believe it is because the dense grass clippings held a considerable amount of water after each rain and so did not put any demand on the bucket for water (hence received no nutrients). This is less of a problem if compost or field fertilizer is spread across the wick and just water is in the bucket.
The bucket provides a sufficient reservoir of water that the garden should go for a day without attention. However, once the bucket is empty you are instantly out of water. (In contrast, a shallow bed may contain less water, but the plants run out more slowly as they must extract water from the medium with increasing difficulty.) In practice, I highly recommend that any of these gardens be tended daily, especially once the plants are bigger. Used plastic buckets can be purchased in Florida for a dollar or less from bakeries or paint stores. The price can be much higher in some locations. If the price is high in relation to a day's wage, it is not only more difficult for the poor to afford, it is in danger of theft.
TIRE GARDENS. I visited Doug VanHaitsma and his national colleagues in El Salvador to evaluate the potential of urban gardening in a low-income part of San Salvador. After seeing slides of all the methods that we have explored, everyone chose the tire gardens as most relevant for their needs.
tire garden construction
The tire gardens are the "jeep" of above-ground gardening methods: portable gardens that can literally go almost anywhere. The garden is made from an old tire and a small sheet of plastic film (e.g. a garbage bag). The group in El Salvador had fun moving a tire garden to unlikely places for a garden: on a flat rock, on a steep hillside supported on the downhill side with rocks, on the roots under a tree. If there is danger of theft or damage by chickens and goats, the tire can be placed on top of something, even along the edge of the tin roof of a shanty. (People often put pieces of iron on this type of roof to keep it from blowing away because there is not enough framing to adequately secure the corrugated roofing, so a few gardens might not be a problem.)
If a vegetable needs full sun in the winter it can be set there, then gradually moved into the shade of a tree as the season approaches when the sun is overhead. If the garden is on a rooftop, it can be placed on sticks or stones so that air can circulate underneath, keeping the roof surface dry. If gardeners themselves have to move, they can take their gardens and their improved soil to their new home. When ECHO staff member Dan Holcombe (in picture) returned from his vacation to the church in Mexico City where he had a rooftop tire garden, he found it flourishing-on a different building. The church moved it to add a second story to their original building.
Construction is simple and elegant. Lay a tire flat on the ground. Note that the top rim is a mirror image of the bottom rim. With a knife or machete, cut off the top rim. Place a piece of plastic inside the tire on the bottom rim, large enough so that an inch or two of plastic stands up along the walls of the tire. Now turn the top rim that has been cut off upside down. It fits like a lock on the bottom rim, holding the plastic firmly in place. If the plastic is trimmed to near the bottom of the tire, the garden will essentially be a portable "shallow bed garden." If the plastic is left so that a pool of water is formed, it will be more like the "shallow pool garden."
Any suitable soil, compost or potting mix can be used to fill the tire. You will need to judge when/if fertilizer is needed, based on what you use for a medium and how plants are growing. At ECHO we sometimes place an empty flower pot or a PVC pipe in the center so that we can see how much (if any) water is standing in the bottom and so judge when to water. We usually incorporate something with a lot of air space into the medium. This also helps extend the growing medium that is usually in short supply, and makes the garden much lighter. At ECHO we use cola cans with holes cut into the sides so roots can penetrate the can. In El Salvador coconut husks, which are everywhere, were broken up and incorporated. In Mexico City, Dan used a layer of alfalfa hay to provide initial aeration plus subsequent nutrients.
THE URBAN AGRICULTURE NETWORK has been active since 1993, and now has 3000 members in 40 (primarily developing) countries. Network staff wrote the book reviewed below. They have an information and technical referral service on UA, assist networking among groups who work in adjacent countries, sponsor regional workshops and newsletters, advise on UA policy, and support research of people doing graduate degrees related to UA. They have an extensive library in Washington, D.C., which network members may use during a visit. Contact Jac Smit (President) at 1711 Lamont St., N.W., Washington, D.C. 20010, USA; phone 202/483- 8130; fax 202/986-6732; e-mail 72144.3446@compuserve.com; they are developing a web page.
URBAN AGRICULTURE: FOOD, JOBS AND SUSTAINABLE CITIES (300 pp., from the Urban Agriculture Network and the United Nations Development Programme) examines factors which influence urban food production systems (including animals) worldwide. This is the most comprehensive resource we have seen on the topic. One of the authors set out to promote urban agriculture, but soon realized that documenting existing activities would be a major task in itself. The book is researched thoroughly, includes many case studies and pictures, and gives helpful perspectives on the current status and potential of food and income production in the city. Topics include: history of urban agriculture (UA), different classes of urban farmers, spaces used for UA, organizations which influence UA, benefits, problems, constraints, and promoting urban agriculture through policy. The book presents a convincing case for urban food production.
Here are a few of the insights excerpted from the book to give you an idea for the variety of its content. As an operational rule of thumb, "urban" is distinguished here as the agricultural product that gets to city markets or consumers the same day it is harvested. By the year 2000, 57% of the poor in developing countries will live in urban areas, up from about 33% in 1988. As many as 80% of the families in some smaller Asian and Siberian cities are engaged in agriculture. Hong Kong, the densest large city in the world, may produce within its boundaries two thirds of the poultry and close to half of the vegetables eaten by its citizens. Singapore is fully self-reliant in meat production. Recent migrants to the city have a difficult time putting together the resources necessary to grow and market their produce; they need time to adapt rural technologies to their new urban environment. The book is available from the UA Network above or UNDP, Urban Development Unit, DC1- 2080, One United Nations Plaza, New York, NY 10017, USA; fax 212/906-6471.
CITIES FEEDING PEOPLE: AN EXAMINATION OF URBAN AGRICULTURE IN EAST AFRICA (146 pp.) argues the case that urban food production should have a larger role in providing food for city dwellers. The book, published by IDRC in Canada, documents the extensive role of urban agriculture already practiced in East Africa, with detailed case studies from Tanzania, Uganda, Kenya, and Ethiopia. This study is insightful for people seeking to understand and promote food production in the cities. The book costs US$14.95 plus shipping from UNIPUB, 4611-F Assembly Drive, Lanham, MD 20706, USA; phone 800/274-4888 or 301/459-7666; fax 800/865-3450; e-mail query@kraus.com.
 |
 |
